Jolt Field Manual
JOLT™ · A RAMBAM’S LADDER PRODUCT

Jolt Official Field Manual

Your complete guide to using every tool inside the JOLT™ app — from your first conduit bend to your final code check. Open Jolt, follow the steps, and get the job done right.

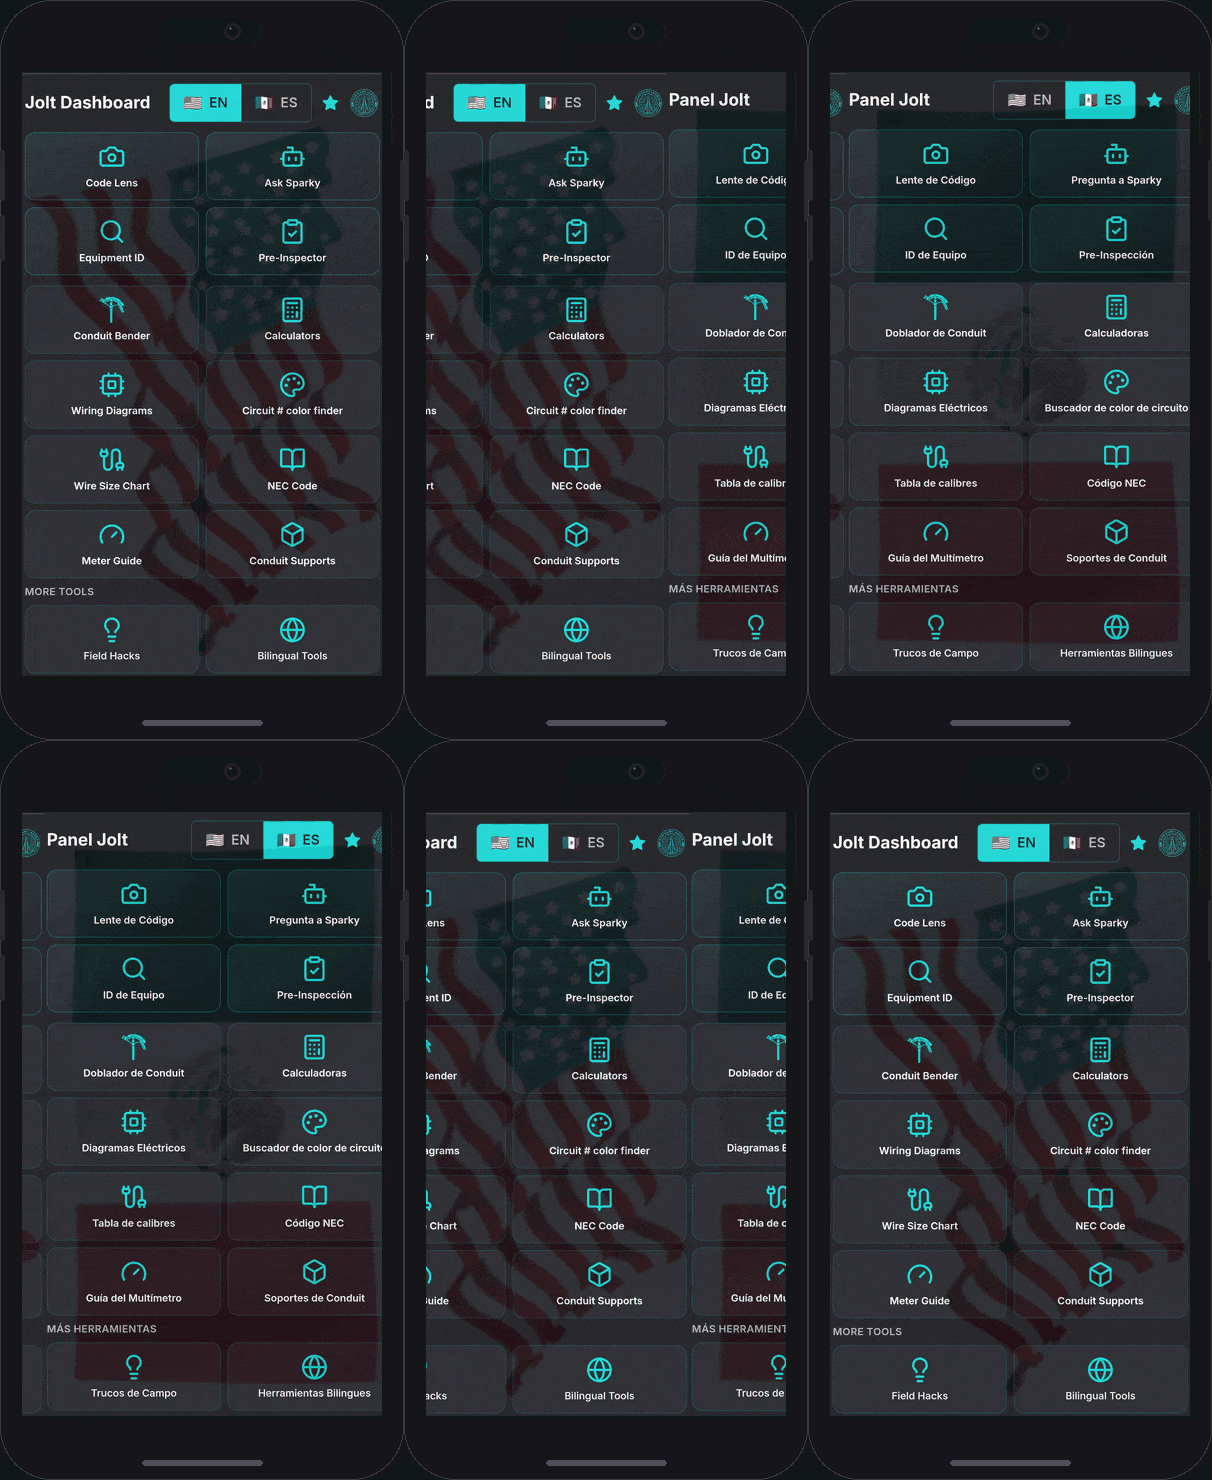
Jolt App Dashboard — EN and ES

⚡ Safety First — Before You Touch Anything ALWAYS OPEN

Our company’s purpose is to strengthen your hand, not to injure you or cause damage. In order to do that, please understand the following: working with electricity is inherently dangerous, if not potentially deadly. JOLT™ is designed to be used on live jobs. Before you pull up any tool in the app, run through this checklist. Every single time. No exceptions. The app can calculate anything — but it cannot protect you from energized conductors.
🔴 De-energize Before You Work

Electricity does not warn you. It does not give second chances. The steps below are not suggestions — they are the difference between going home and not going home.

1

Locate the correct breaker. Find the panel feeding the circuit you are working on. If labels are missing or unclear, use a non-contact voltage tester (NCVT) to trace the circuit before touching anything. Never guess.

2

Turn off the breaker and lock it out. Flip the breaker to OFF. If you have a lockout/tagout (LOTO) kit, apply it now. Hang your personal lock — no one removes it except you. If you do not have a LOTO kit, tape the panel door shut and write your name on the tape.

3

Test before you touch. At the device or junction box you are working on, test all conductors — black, white, and bare/green — with your NCVT. Test twice. A single beep means the circuit is still live. Do not proceed until all conductors test dead.

4

Verify your tester works. Before and after testing the circuit, test your NCVT on a known live outlet. If it does not beep on the live outlet, the tester’s battery is dead. Replace it before continuing.

5

Wear your PPE. Minimum: safety glasses and insulated gloves rated for the voltage you are working near. Arc flash gear is required for any work inside an energized panel. When in doubt, wear more protection, not less.

6

Tell someone. If you are working alone, let someone know where you are and what you are doing. If you are in a commercial building, follow the facility’s permit and notification procedures.

How Jolt supports safety: The Jolt app’s Code Lens feature can instantly pull up the NEC section governing the work you are about to do — including required clearances, conductor sizing minimums, and grounding requirements. Use it before you start, not after. Sparky can also answer “what are the safety requirements for [task]?” in plain language.

📐 Conduit Bending Tools 4 Tools

Conduit bending is one of the most skill-dependent tasks in the trade. Jolt’s bending calculators remove the guesswork — you enter your measurements and JOLT™ gives you the exact travel (your marks), your multipliers, shrinkage and now has an expandable “The Math” section so you can actually learn how to calculate without the app. The result looks like you have been bending conduit for 20 years.
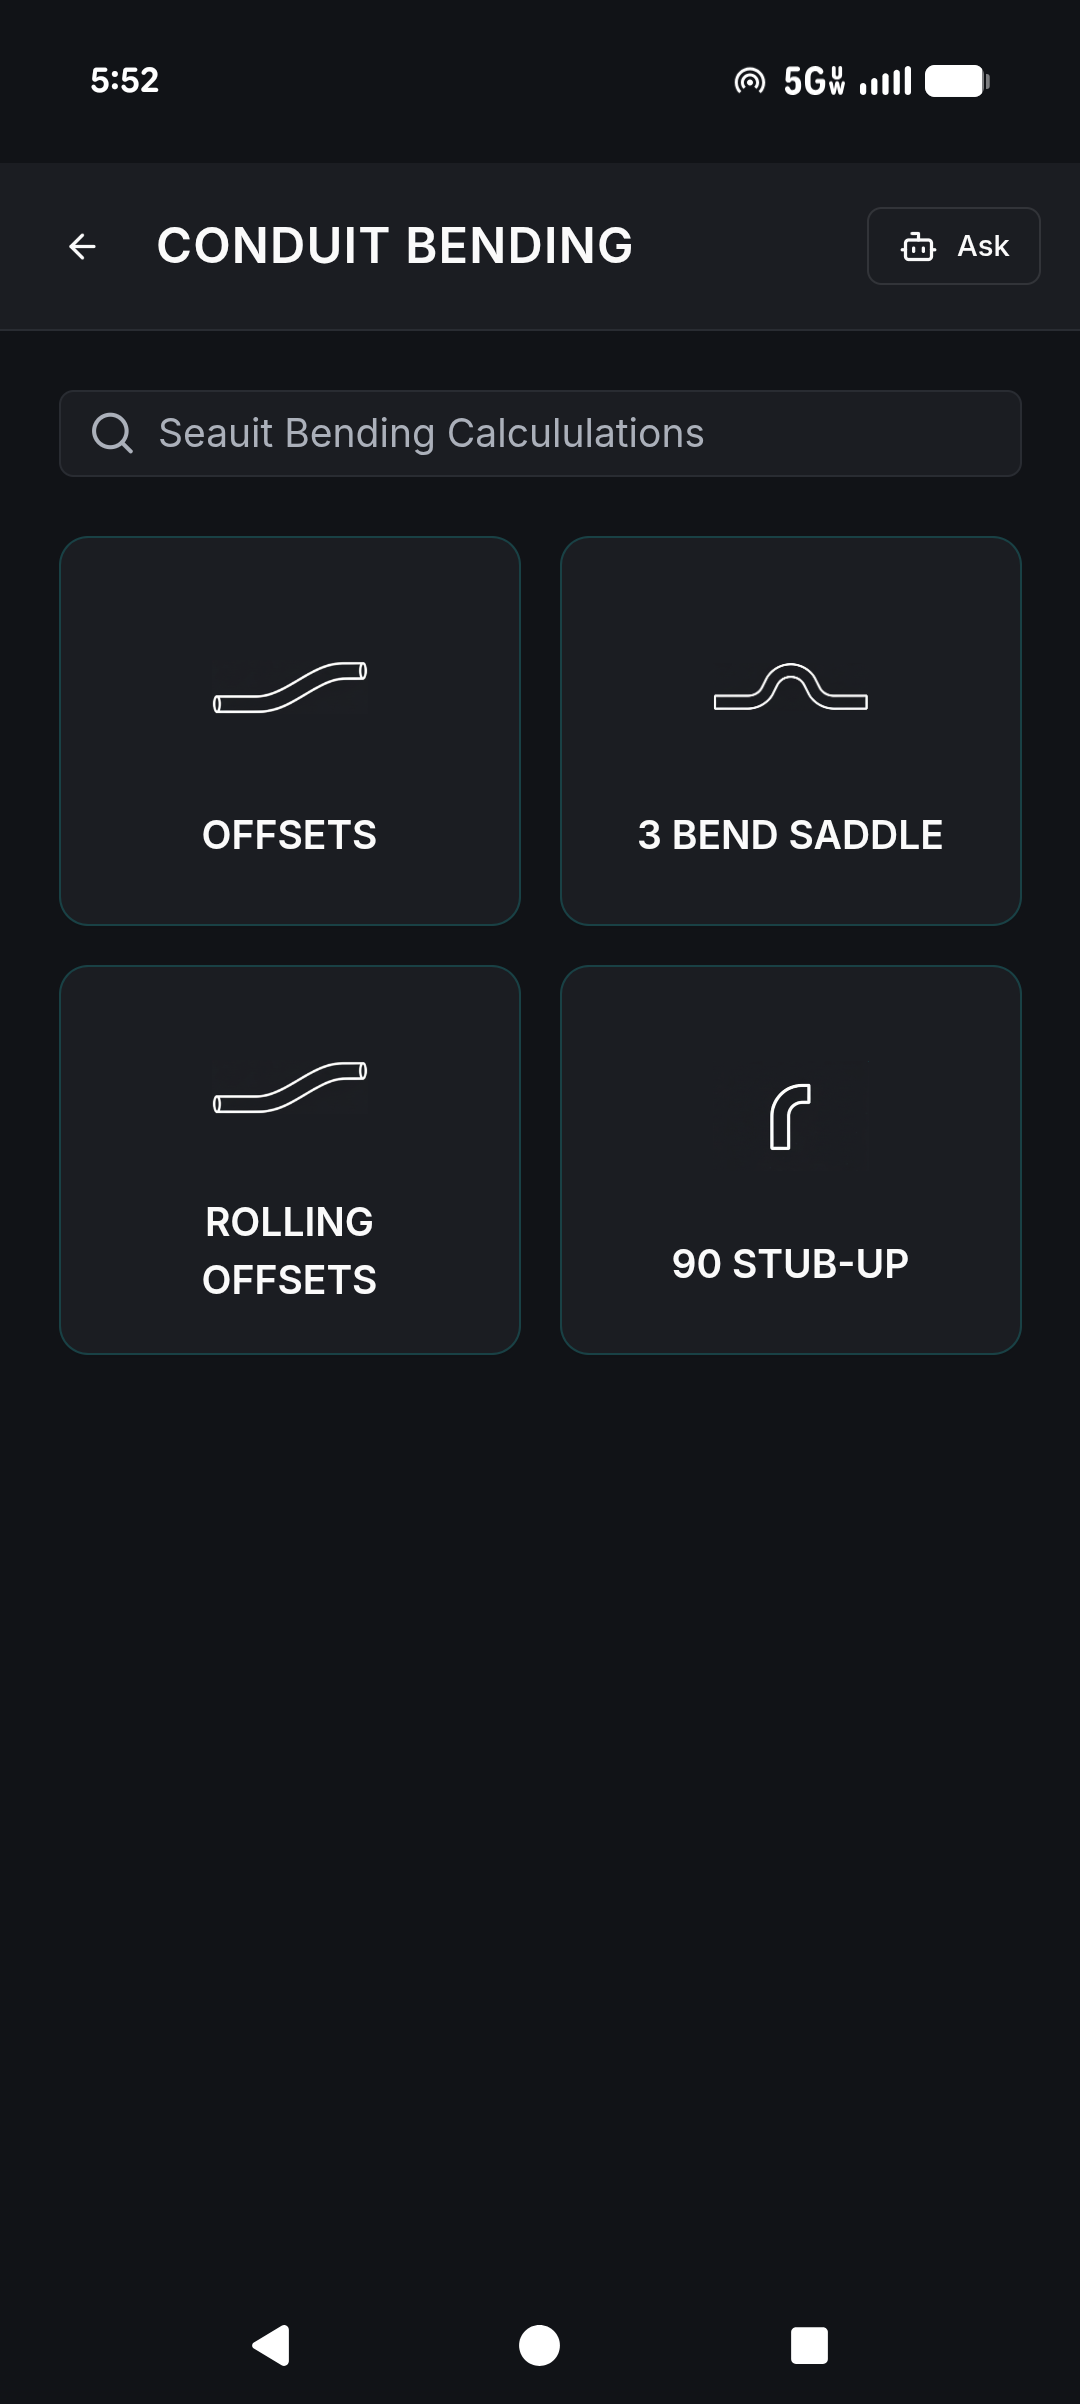
Jolt Conduit Bending Menu Jolt Conduit Bending menu — four dedicated calculators
Offsets

Offset Bends

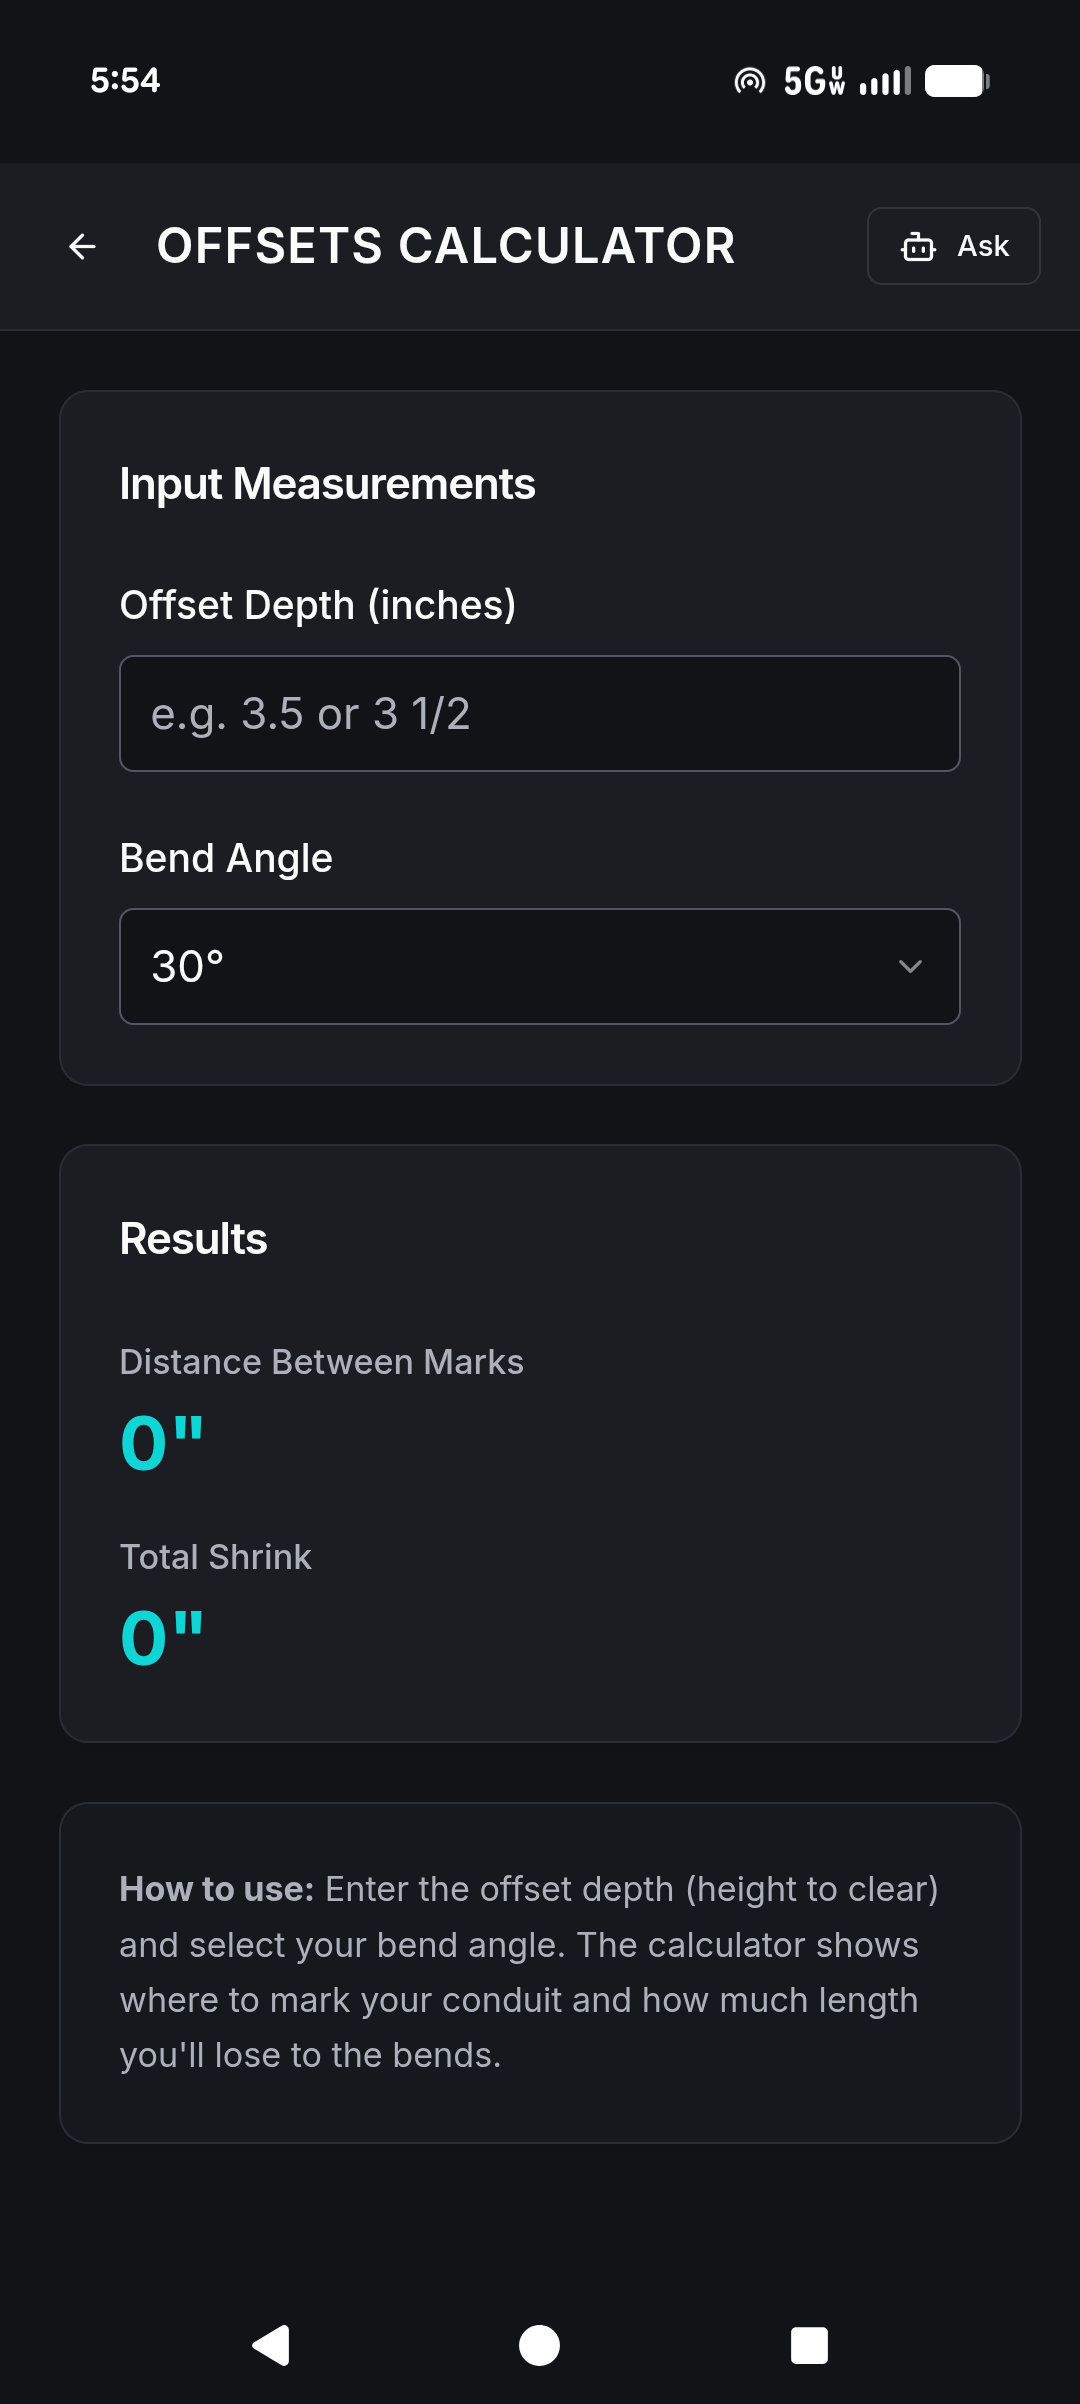
Jolt Offset Calculator Offset Calculator screen
What This Is

An offset is two bends of equal angle that elevate the conduit or change its path to clear an obstruction — a beam, a box knockout, a floor penetration. The two bends must be perfectly matched or the conduit will dog leg and look like amateur garbage.

Jolt Steps
  1. 1Measure the distance to the obstruction, then measure how high you need to offset the conduit to clear it.
  2. 2Open JOLT™ → Conduit Bending → Offsets.
  3. 3Enter the offset height and your bend angle (10°, 22°, 30°, 45°, or 60°).
    Pro Tip: If you’ve got a pipe to clear, measure to the top of the pipe plus a little extra. If clearing the pipe takes 3 inches, tell JOLT™ you need a 4-inch offset. Assume the plumbers or HVAC guys might come back and wrap insulation on that pipe.
  4. 4JOLT™ gives you the distance between marks and the shrinkage to subtract from your measurement.
  5. 5Tap The Math to see the exact formula with your numbers plugged in.
  6. 6The results card shows the Multiplier in amber — the number JOLT™ used to calculate your mark distance. Knowing the formula behind the number is how you level up fast.
Field Execution
Mark your first bend point on the conduit. Measure the distance JOLT™ gave you and mark the second point. Put the bender’s arrow on the first mark, bend to your angle. Do not flip the bender. Rotate the conduit 180 degrees, slide it to the next mark, and bend to the exact same angle. The conduit should lay flat with a clean parallel offset.

Lay a level across both runs — they better be parallel. Your offset height should match your target measurement within ¼ inch.
Saddles

3-Bend Saddle

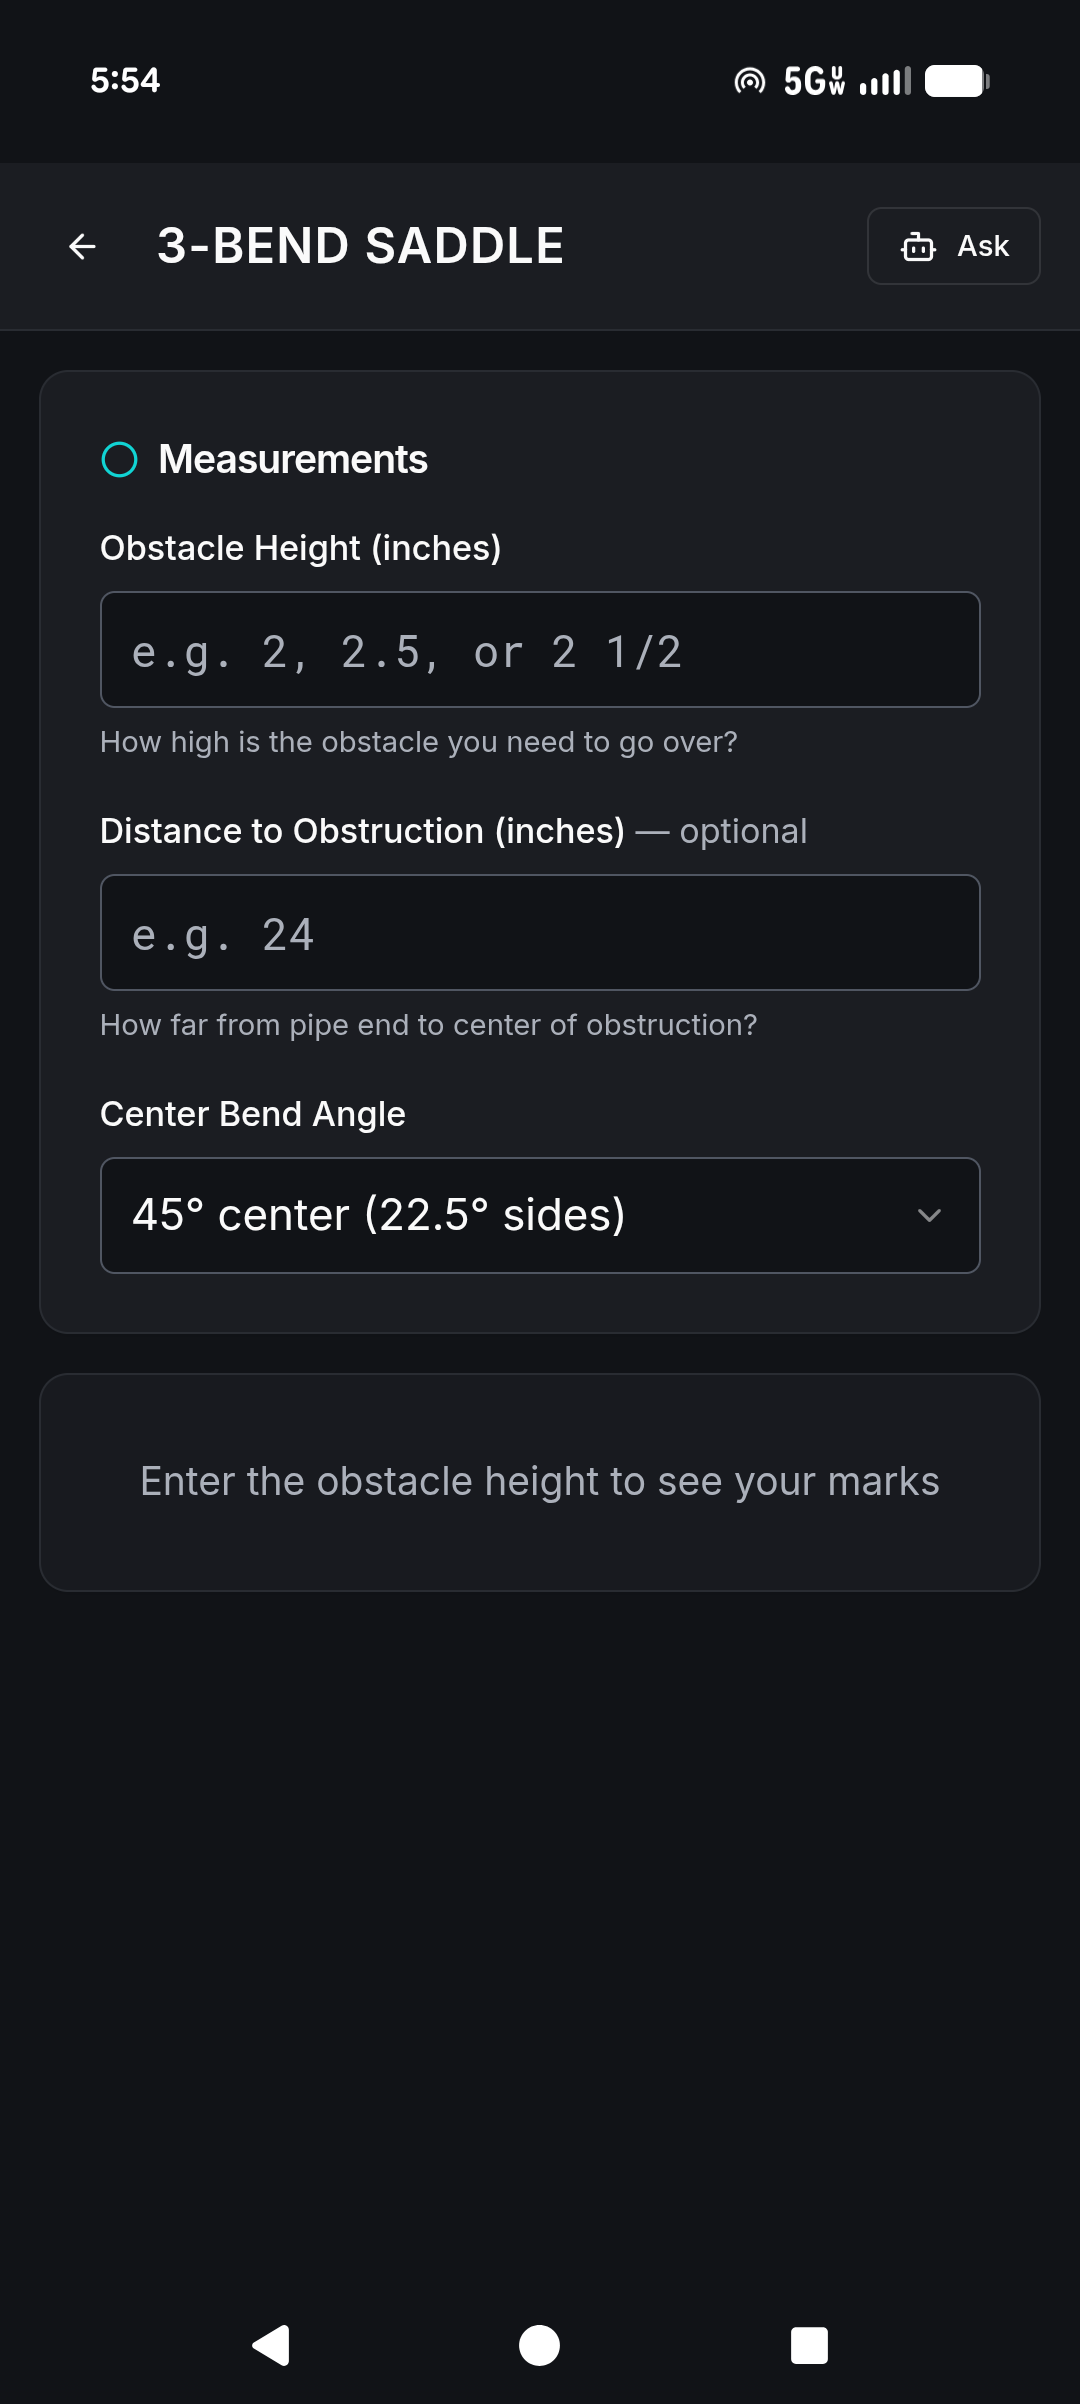
Jolt 3-Bend Saddle Calculator 3-Bend Saddle Calculator screen
What This Is

A 3-bend saddle straddles an obstacle — a pipe, a beam flange, a duct — without cutting the conduit run. Three bends create a smooth arch over the obstruction. The center bend is twice the angle of the two outer bends.

Jolt Steps
  1. 1Open Jolt → Conduit Bending → 3-Bend Saddle.
  2. 2Enter the obstacle height and the distance from your reference point to the center of the obstacle.
  3. 3Jolt hands you the three mark locations and the bend angles for each.
  4. 4Tap The Math to see the exact formula with your numbers plugged in.
Field Execution
Step 1 — Center bend first, use the notch. Transfer Jolt’s three marks to your conduit. Set the bender on the floor, foot on the base. Slide the conduit in and line your center mark up with the notch on the bender shoe — not the arrow, the notch. Bend to 45° (or whatever center angle Jolt gave you). This is your biggest bend and it goes first, every time.

Step 2 — Slide and rotate 180° for the first outside bend. Don’t pull the conduit out of the bender. Slide it forward until your first outside mark lines up with the arrow on the bender shoe. Now rotate the conduit 180° — the center bend should be in a V-shape pointing down, and the long end of the conduit will be up in the air. Bend to 22.5° (half the center angle).

Step 3 — Flip the conduit for the last bend. Pull the conduit out of the bender. Flip it end-for-end so the bender mouth faces toward the center bend. Slide the second outside mark up to the arrow. Bend to 22.5°. This bend is a mirror image of the first outside bend.

Check your work: Set the conduit down. It should sit flat on both sides of the obstacle with zero rocking. The arch should clear the obstruction by at least ½ inch. If it rocks, one of your outside bends is off — check that both were made to the same angle.
Rolling Offset
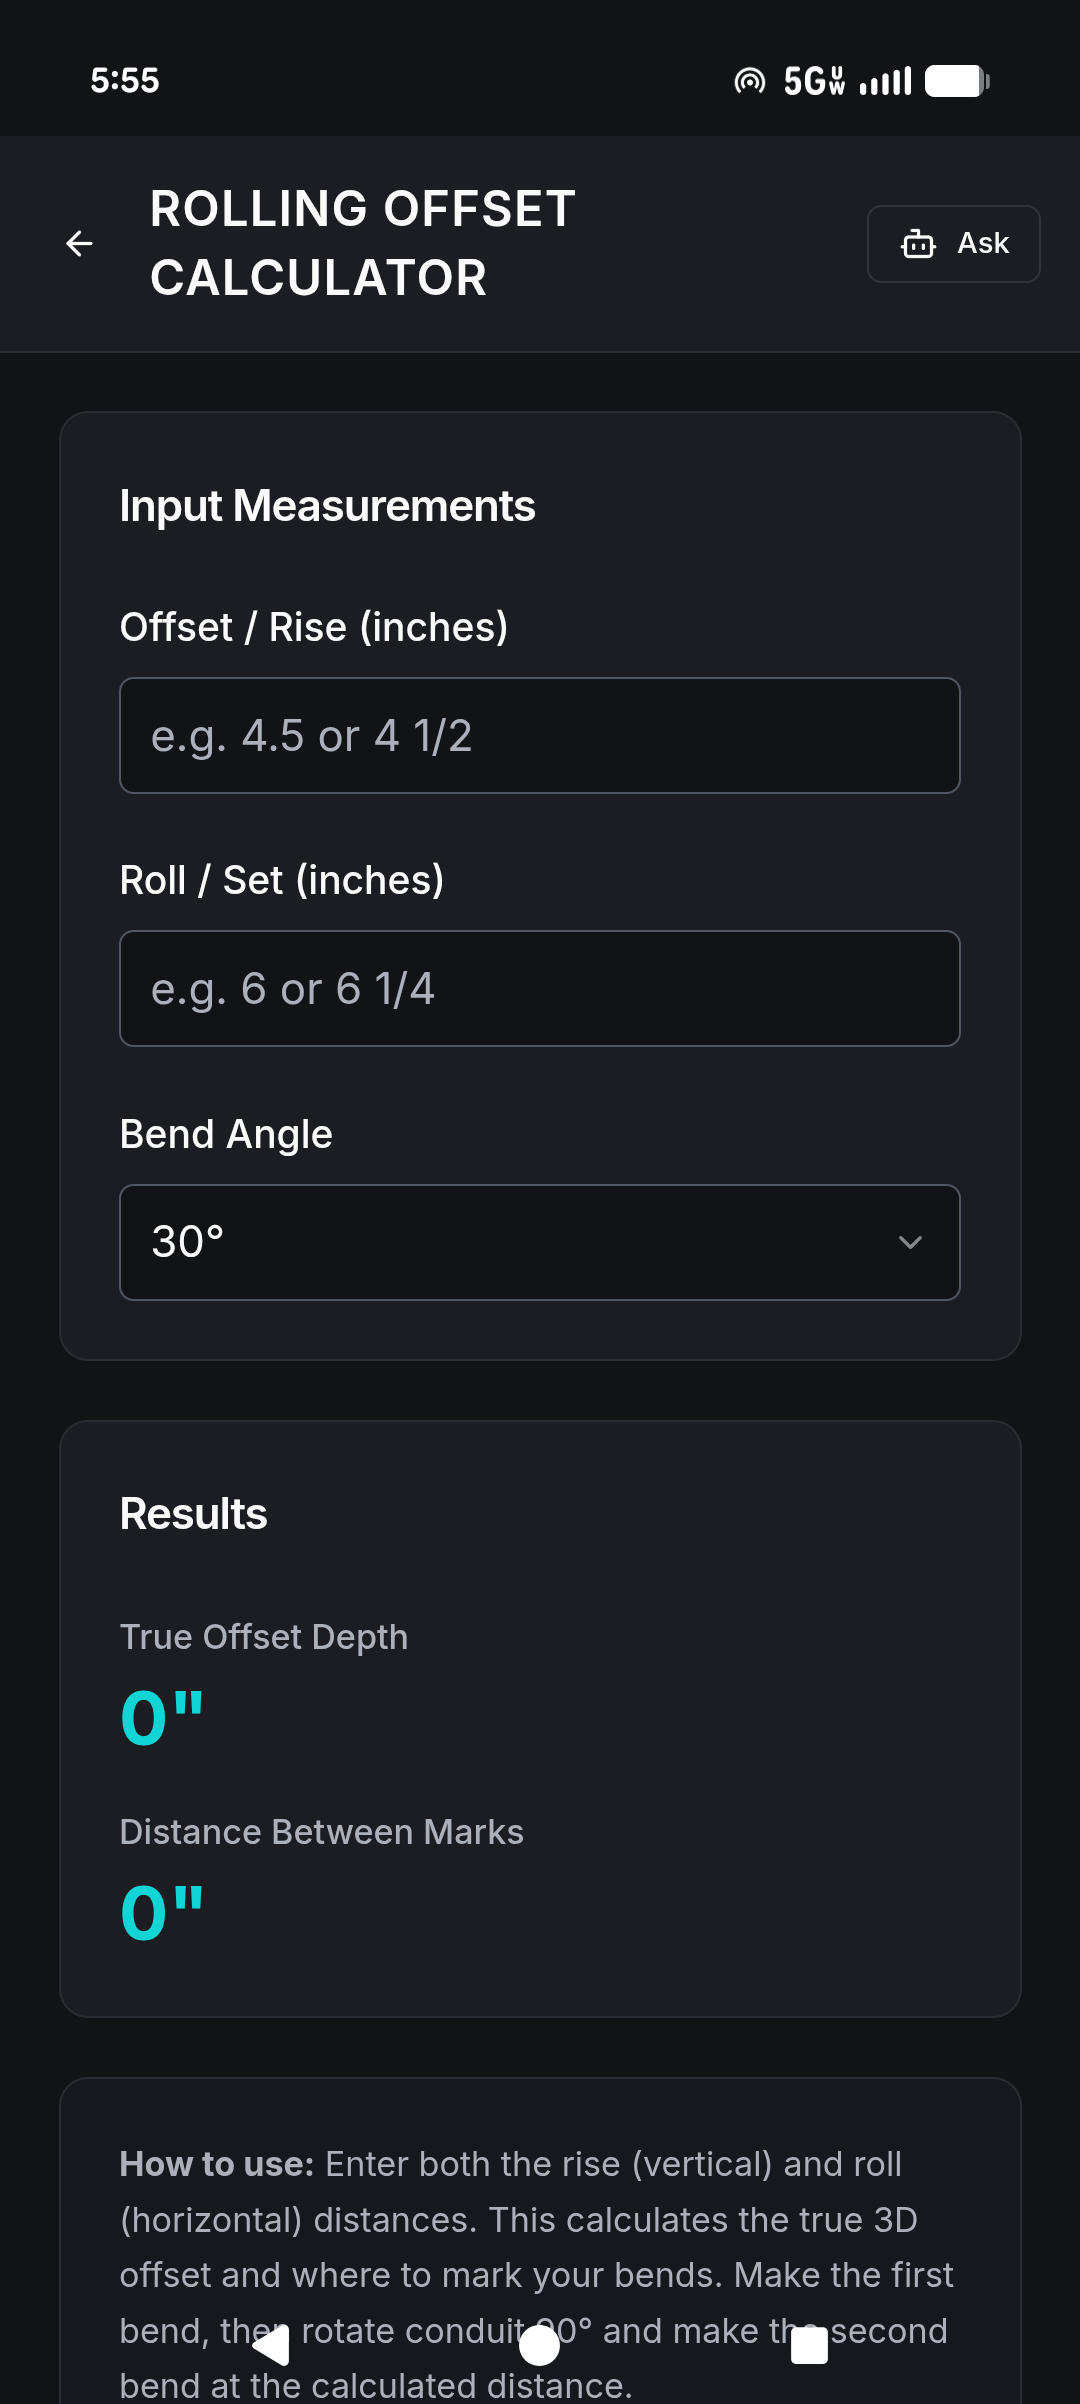
Rolling Offset

Jolt Rolling Offset Calculator Rolling Offset Calculator screen
What This Is

A rolling offset moves conduit in two directions at once — both up/down and left/right — in a single pair of bends. This is the most spatially complex bend you’ll make. Without a calculator, you’re doing trigonometry on a piece of cardboard. With Jolt, it takes 10 seconds.

Jolt Steps
  1. 1Open Jolt → Conduit Bending → Rolling Offset.
  2. 2Enter the vertical rise (change in elevation) and the horizontal roll (change in side-to-side position).
  3. 3Jolt calculates the true offset distance and spits out the exact marks and shrinkage.
  4. 4Tap The Math to see the exact formula with your values plugged in.
  5. 5The results card shows the Multiplier in amber.
Field Execution
Transfer Jolt’s marks to the conduit. Make the first bend, then rotate the conduit to the required roll angle and make the second bend. Make sure the conduit clears the obstacle and holds the right trajectory.
Stub-Up

Stub-Up (90° Bend)

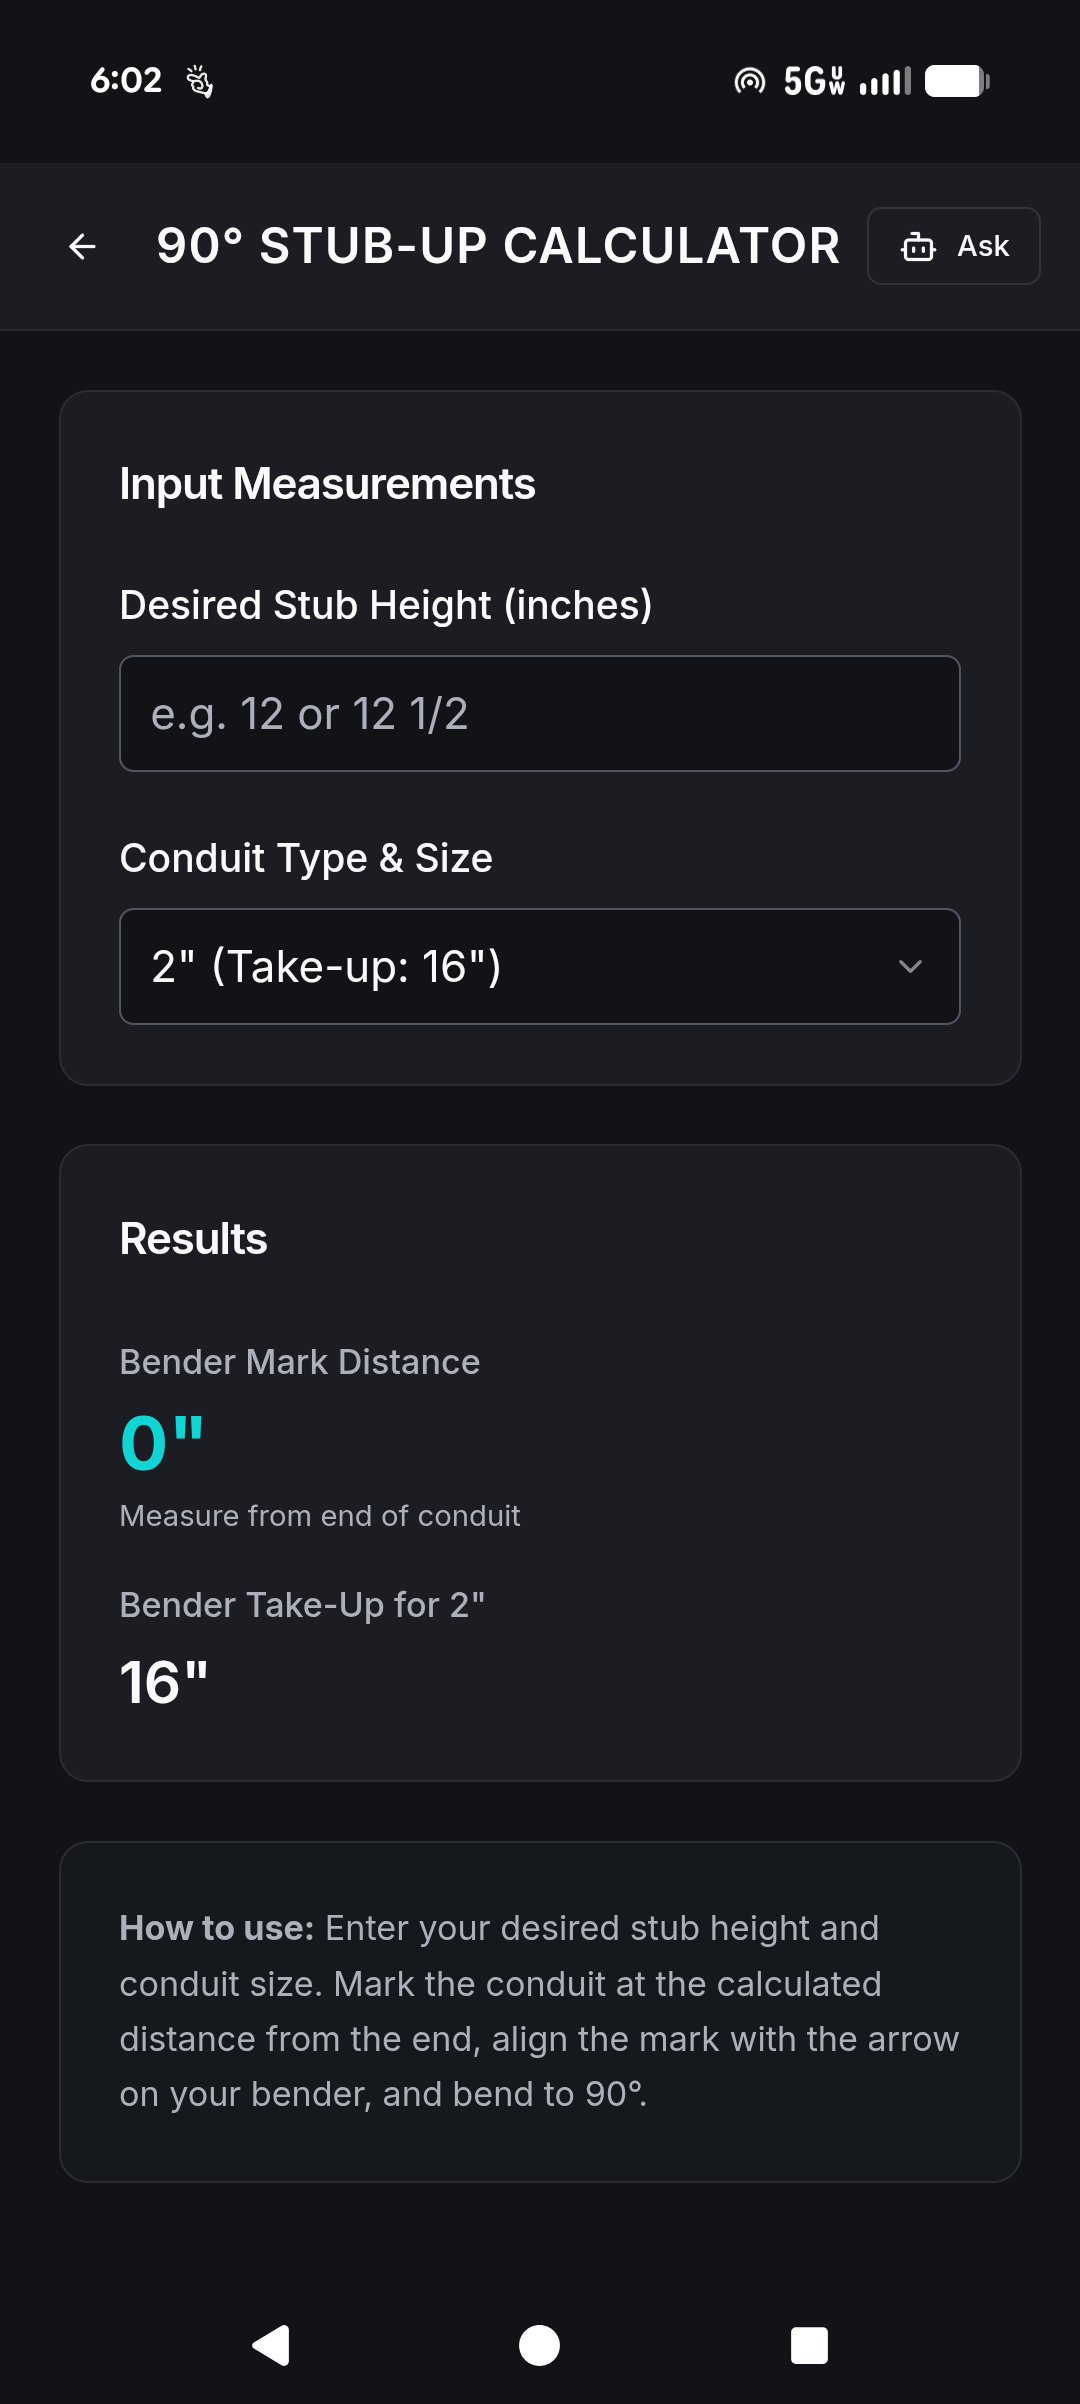
90° Stub-Up Calculator 90° Stub-Up Calculator
What This Is

A standard 90-degree bend that kicks the conduit from horizontal to vertical. The only hard part is accounting for the bender’s “take-up” — the chunk of conduit eaten up by the radius of the bend.

Jolt Steps
  1. 1Open JOLT™ → Conduit Bending → Stub-Up.
  2. 2Enter your desired stub height in inches (it takes fractions like 12 1/2).
  3. 3Select your conduit type and size. JOLT™ automatically applies the correct take-up (e.g., 16″ for 2″ conduit).
  4. 4JOLT™ hands you the exact Bender Mark Distance to measure from the end of the conduit.
  5. 5Tap The Math to see the exact formula with your values plugged in.
Field Execution
Measure from the end of the conduit and mark the distance JOLT™ gave you. Put the bender’s arrow on the mark and bend to a full 90 degrees. Throw a level on it to make sure the stub is dead plumb.

🧮 Electrical Calculators 7 Tools

Stop doing math on scrap cardboard and the damn drywall. Jolt’s calculators remove human error and handle the heavy lifting instantly so you can keep your hands on the install.

Conduit Fill

Conduit Fill Calculator

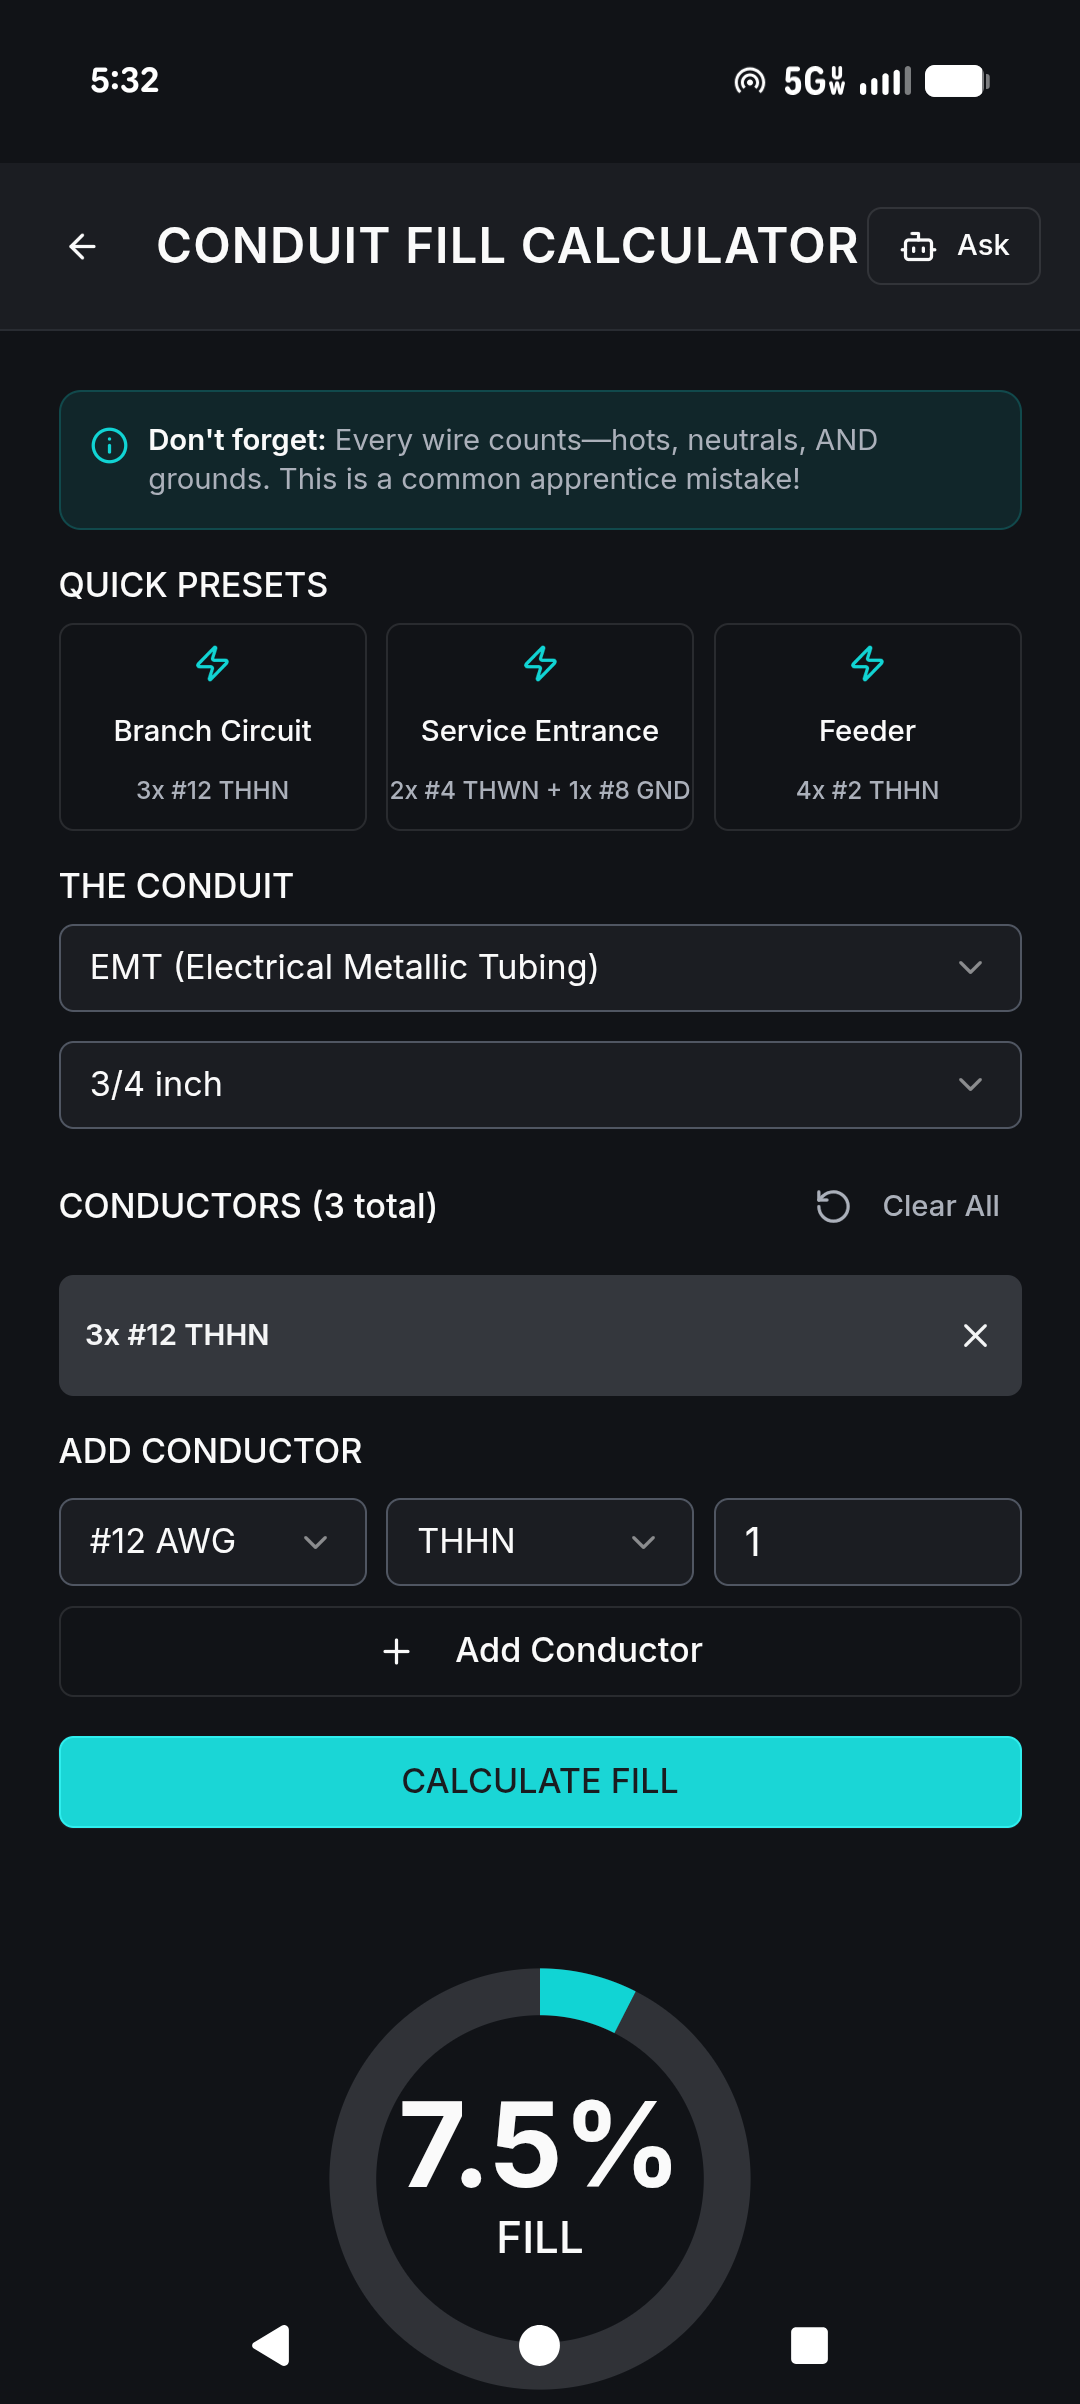
Jolt Conduit Fill Calculator Conduit Fill Calculator screen
What This Is

The best fill calculator out there. Checks your wire area against the allowable fill percentage (usually 40% for 3+ wires). Has Quick Presets, tells you the minimum conduit size, and tells you exactly how many more wires you can jam in there.

Jolt Steps
  1. 1Open JOLT™ → Calculators → Conduit Fill.
  2. 2Use a Quick Preset or manually pick your conduit type/size and add conductors.
  3. 3JOLT™ shows a gauge with your fill percentage.
Field Execution
Before you start yanking wire, check your conduit size and conductor count against Jolt. If you’re pushing that 40% limit, grab the heavy pulling lube and make sure your bends are smooth so you don’t shred the insulation.
What Happens If You Screw This Up Bad: If you overfill a conduit and try to drag it with a tugger, you’re going to strip the insulation clean off the wires, creating a dead short buried somewhere in the middle of the run. Good luck fixing that.
Fractions

Fraction / Tape Measure Calculator

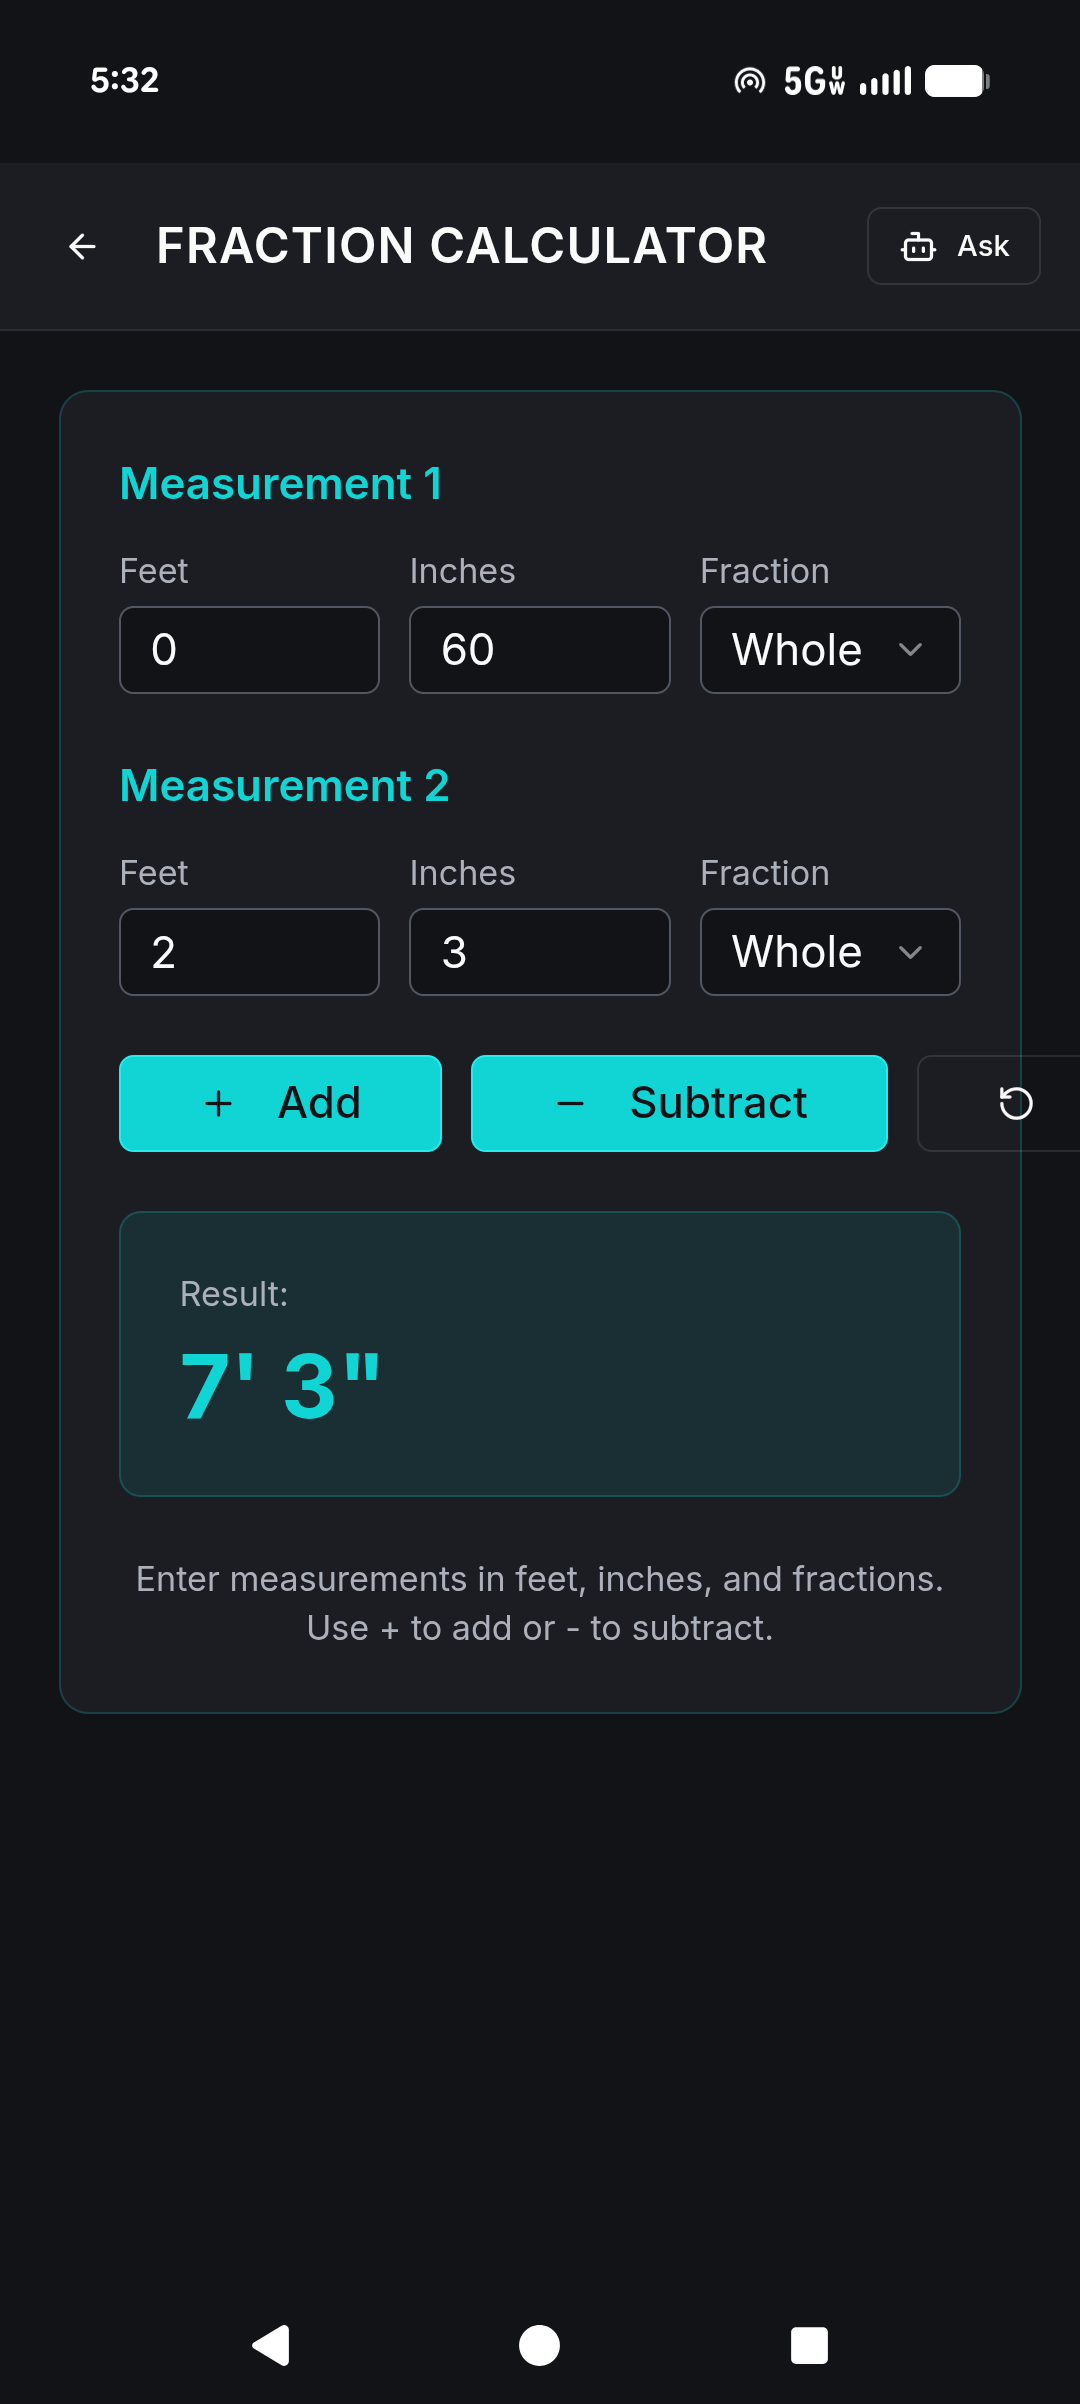
Jolt Fraction Calculator Fraction Calculator screen
What This Is

Adds and subtracts fractions exactly how they look on your tape measure. Stop trying to convert 5/16ths to decimals in your head while you’re on a ladder.

Jolt Steps
  1. 1Open JOLT™ → Calculators → Fraction Calculator.
  2. 2Enter your first measurement in feet, inches, and fractions.
  3. 3Enter your second measurement and hit Add or Subtract.
  4. 4Get the answer in standard feet/inches/fraction and total pure inches.
Field Execution
Read the numbers off your tape, punch them into Jolt, and use the exact answer to mark your strut or conduit. Done.
Blueprint Scale

Blueprint Scale Calculator

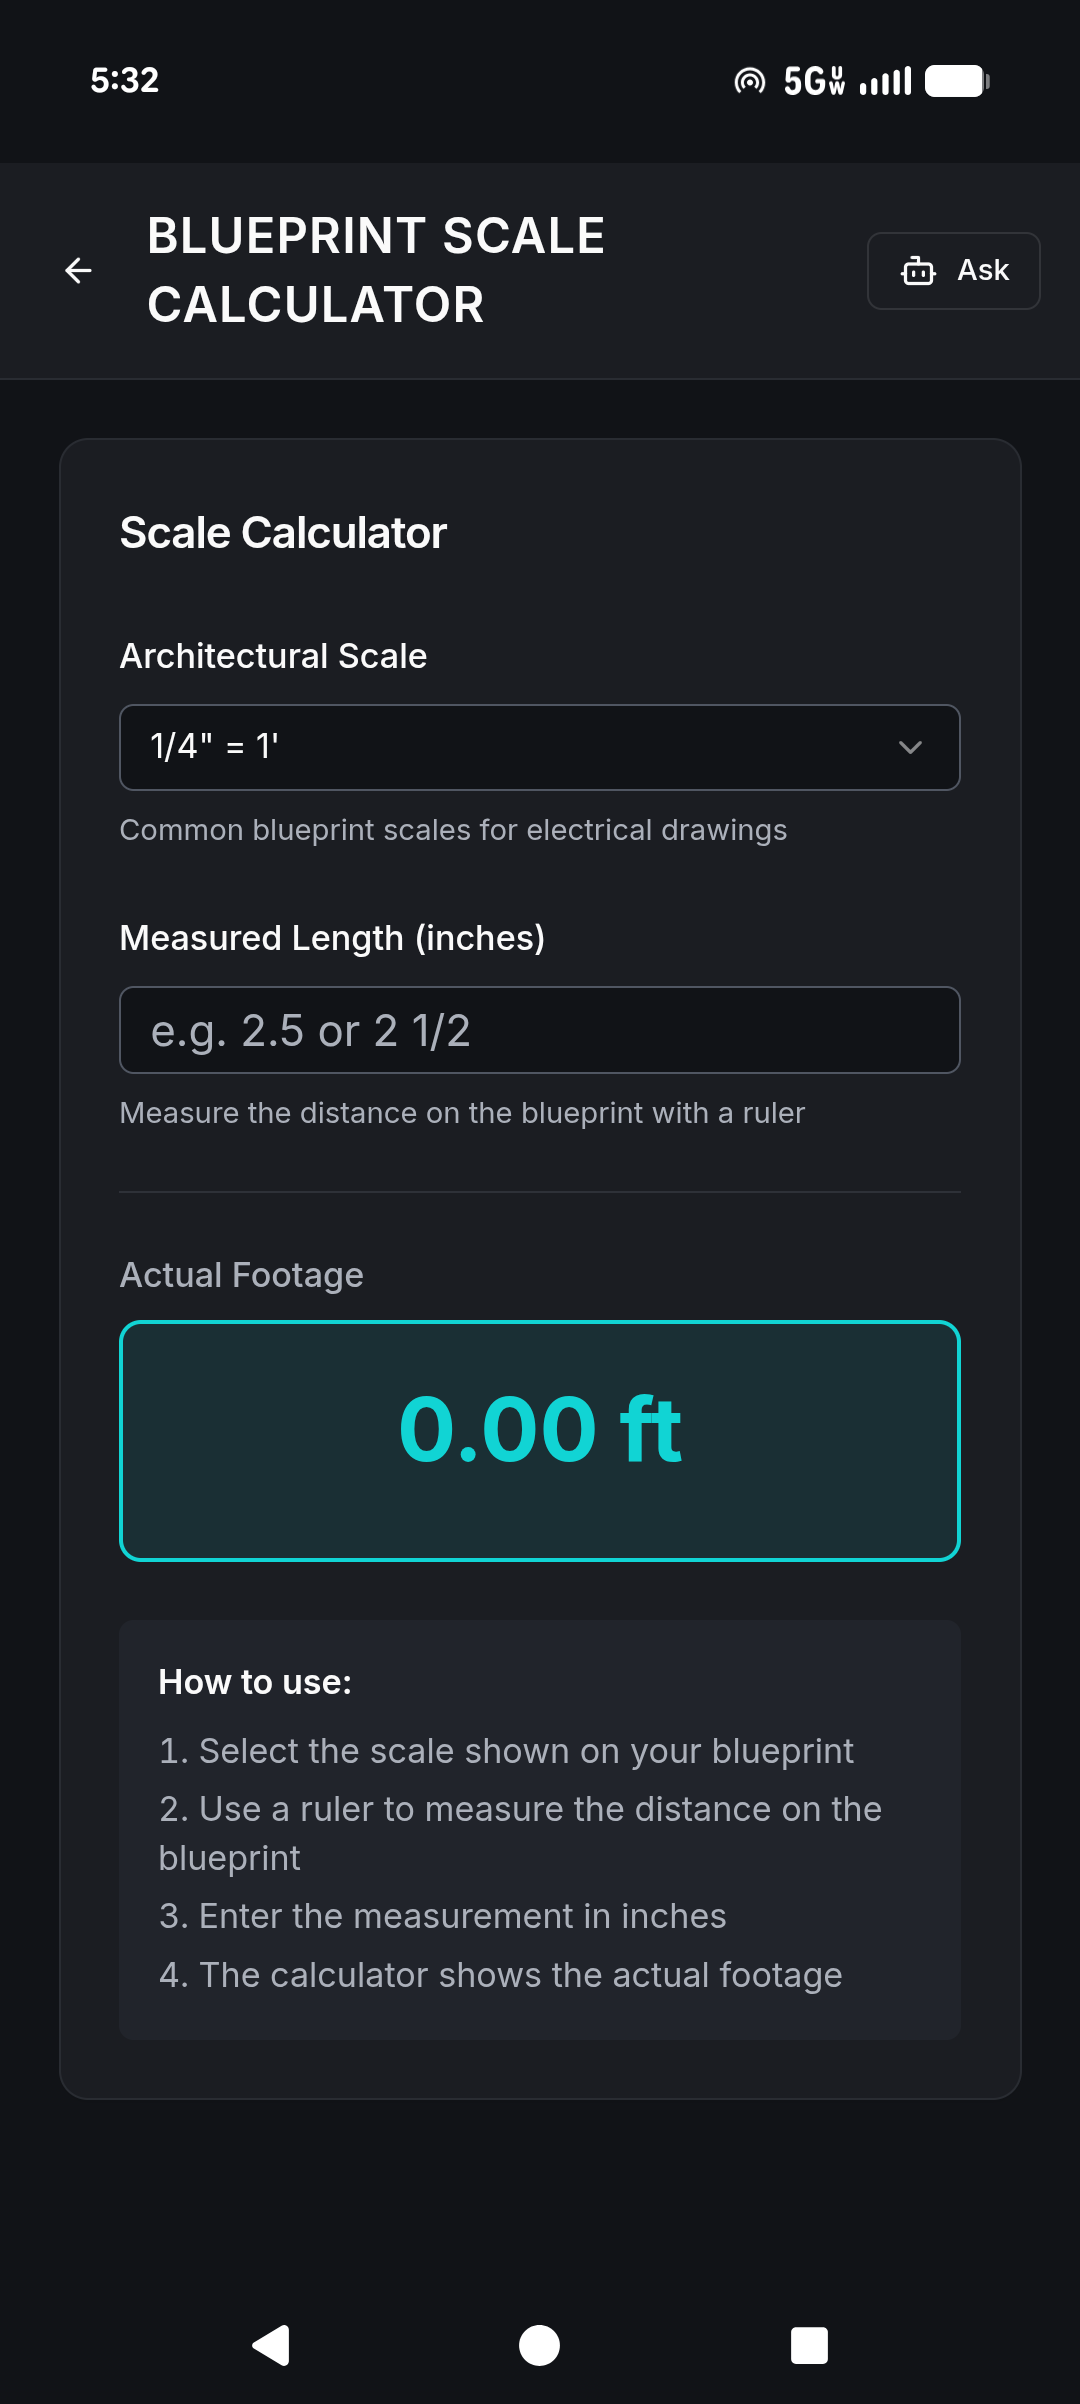
Jolt Blueprint Scale Calculator Blueprint Scale Calculator screen
What This Is

Converts blueprint scale measurements to real-world footage instantly. You need this when you’re doing takeoffs and trying to figure out how much wire to order off the prints.

Jolt Steps
  1. 1Open JOLT™ → Calculators → Blueprint Scale.
  2. 2Pick the architectural scale printed on your plans (like 1/4″ = 1′).
  3. 3Measure the run on the print with a ruler, punch in the inches, and JOLT™ tells you the actual footage.
Field Execution
Lay the prints out, check the scale block, measure the run with your ruler, and let Jolt tell you how many feet of wire you need to pull off the spool.
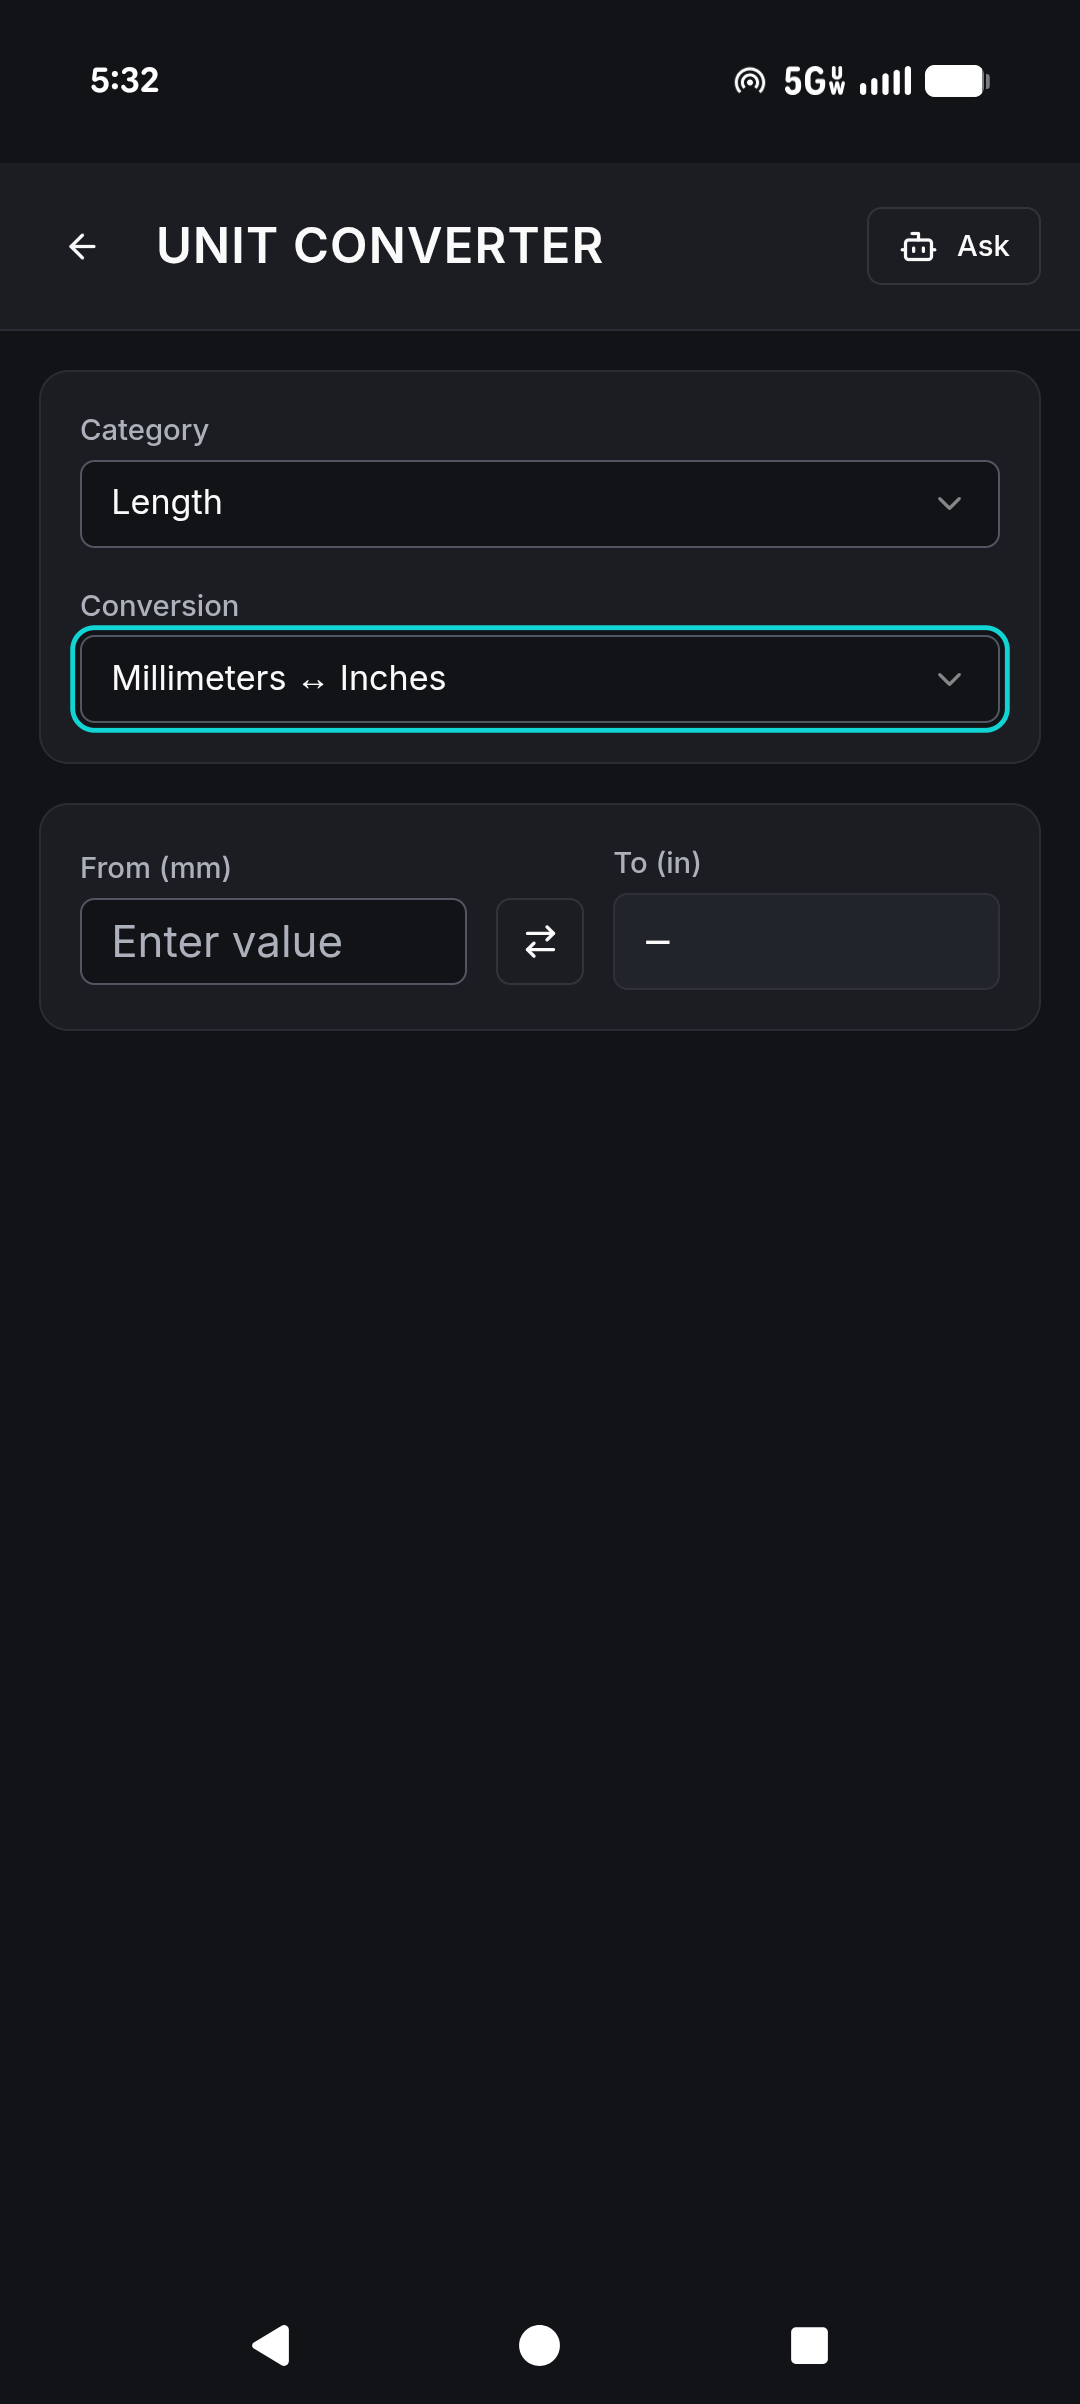
Unit Converter

Unit Converter

Jolt Unit Converter Unit Converter screen
What This Is

Swaps between electrical and measurement units fast. Need to turn millimeters into inches, or figure out how many watts a horsepower is? This does it.

Jolt Steps
  1. 1Open JOLT™ → Calculators → Unit Converter.
  2. 2Pick the category and what you’re converting (e.g., Length: Millimeters ↔ Inches).
  3. 3Type a number on either side to get the answer.
Field Execution
When you’re dealing with European equipment specs or doing motor load calculations, use the converter to get the US-standard numbers you actually need to buy materials.
Ohm’s Law

Ohm’s Law Calculator

What This Is

Calculates Voltage (V), Current (I), Resistance (R), or Power (W) when you only know two of the numbers. You need this for troubleshooting dead circuits or sizing components.

Jolt Steps
  1. 1Open JOLT™ → Calculators → Ohm’s Law.
  2. 2Enter any two numbers you know (e.g., 120V and 15A).
  3. 3JOLT™ instantly spits out the missing values (e.g., 8Ω and 1800W).
Field Execution
Use your meter to verify the actual voltage or resistance in the field, then check it against Jolt’s calculation to figure out if a component is burning up or pulling too much juice.
What Happens If You Screw This Up Bad: If you ignore Ohm’s Law and slap a 2000W heater on a 15A circuit, you’re going to pull 16.6A and trip that breaker every single time it kicks on. Do the math first.
Voltage Drop

Voltage Drop Calculator

What This Is

Calculates how much voltage you’re losing over a long wire run because of the wire’s natural resistance. The NEC wants a maximum 3% drop for branch circuits.

Jolt Steps
  1. 1Open JOLT™ → Calculators → Voltage Drop.
  2. 2Enter wire material (Copper/Aluminum), wire size (AWG), voltage, phase, distance, and load (Amps).
  3. 3JOLT™ gives you the voltage drop percentage and the actual voltage at the end of the run.
Field Execution
If Jolt shows a voltage drop over 3%, bump up your wire gauge in the calculator until the drop gets in range, then go pull that heavier wire for the run.
What Happens If You Screw This Up Bad: If you ignore voltage drop on a 500-foot run out to the site lights, those lights are going to be dim, they’re going to flicker, and any motors on that circuit will burn themselves out prematurely from undervoltage.

🃏 The Four Aces 4 Tools

Most reference apps just give you a digital book to read. Jolt gives you a lethal, four-part tech loadout built specifically for the dirt. This is proprietary, job-site machinery designed to verify your work, kill callbacks, and keep you moving fast. Drop all four on the table and the argument is over.

Ace 1

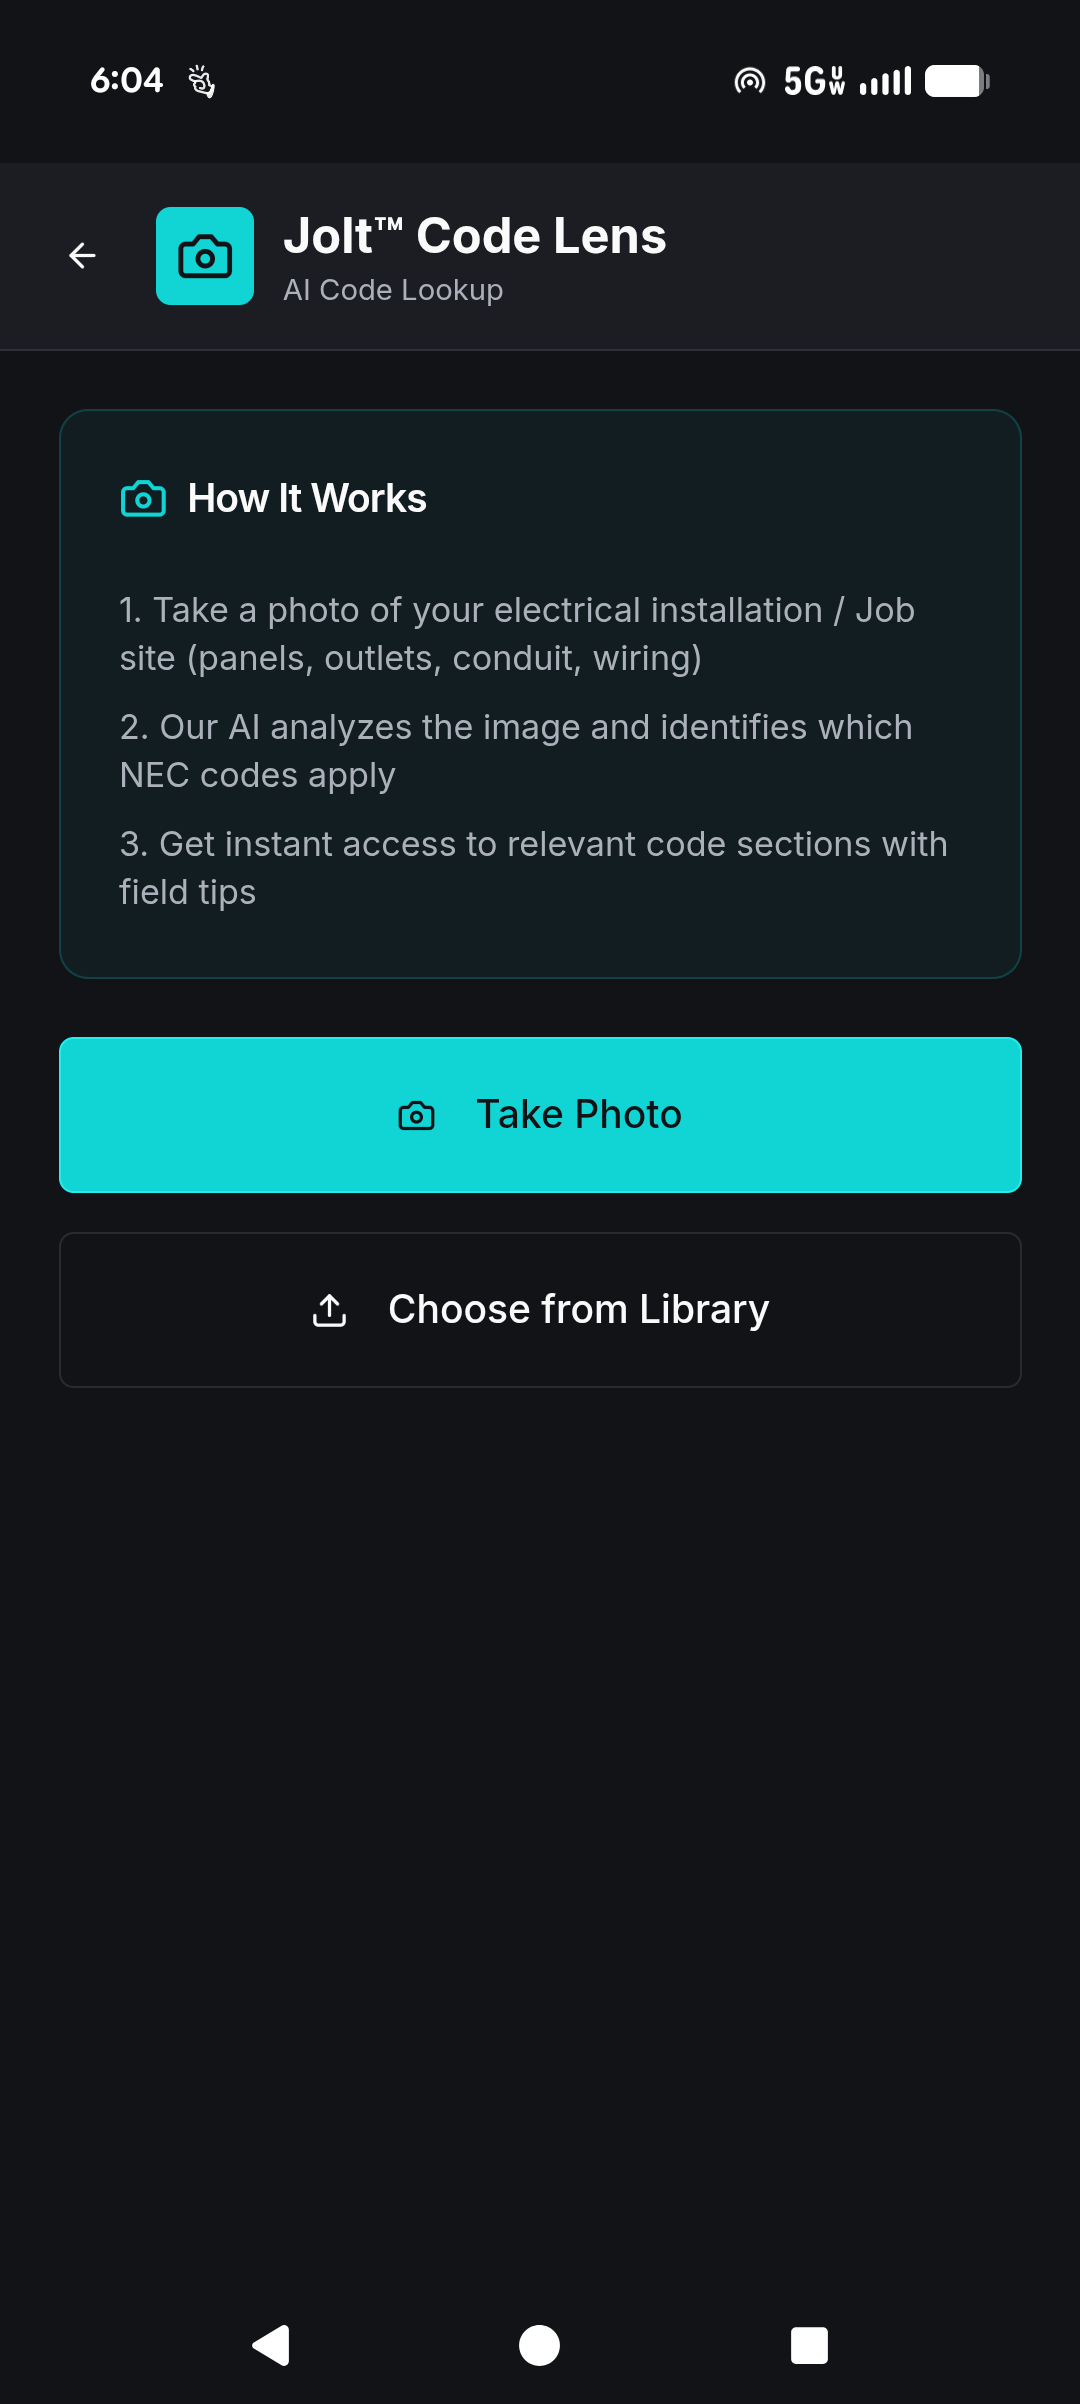
Jolt ⚡ Code Lens™

Jolt Code Lens JOLT™ Code Lens — Automated Code Lookup
What This Is

A visual NEC identification engine. Snap a photo of a panel, conduit run, rough-in or underground in the dirt. The engine instantly analyzes the physical setup and flags the specific NEC code sections and field tips that apply to that exact install. Stop guessing, verify your work, and stop wasting time trying to navigate the code book under temp lighting.

Jolt Steps
  1. 1Open JOLT™ → Code Lens.
  2. 2Tap “Take Photo” to snap a picture of the work, or “Choose from Library” if you already took one.
  3. 3Read the NEC code citations and field tips the tool gives you.
Field Execution
Before you start a messy installation, snap a photo of the area. Read the NEC codes JOLT™ hands you to make sure your routing, clearances, and materials are going to pass inspection.
Ace 2

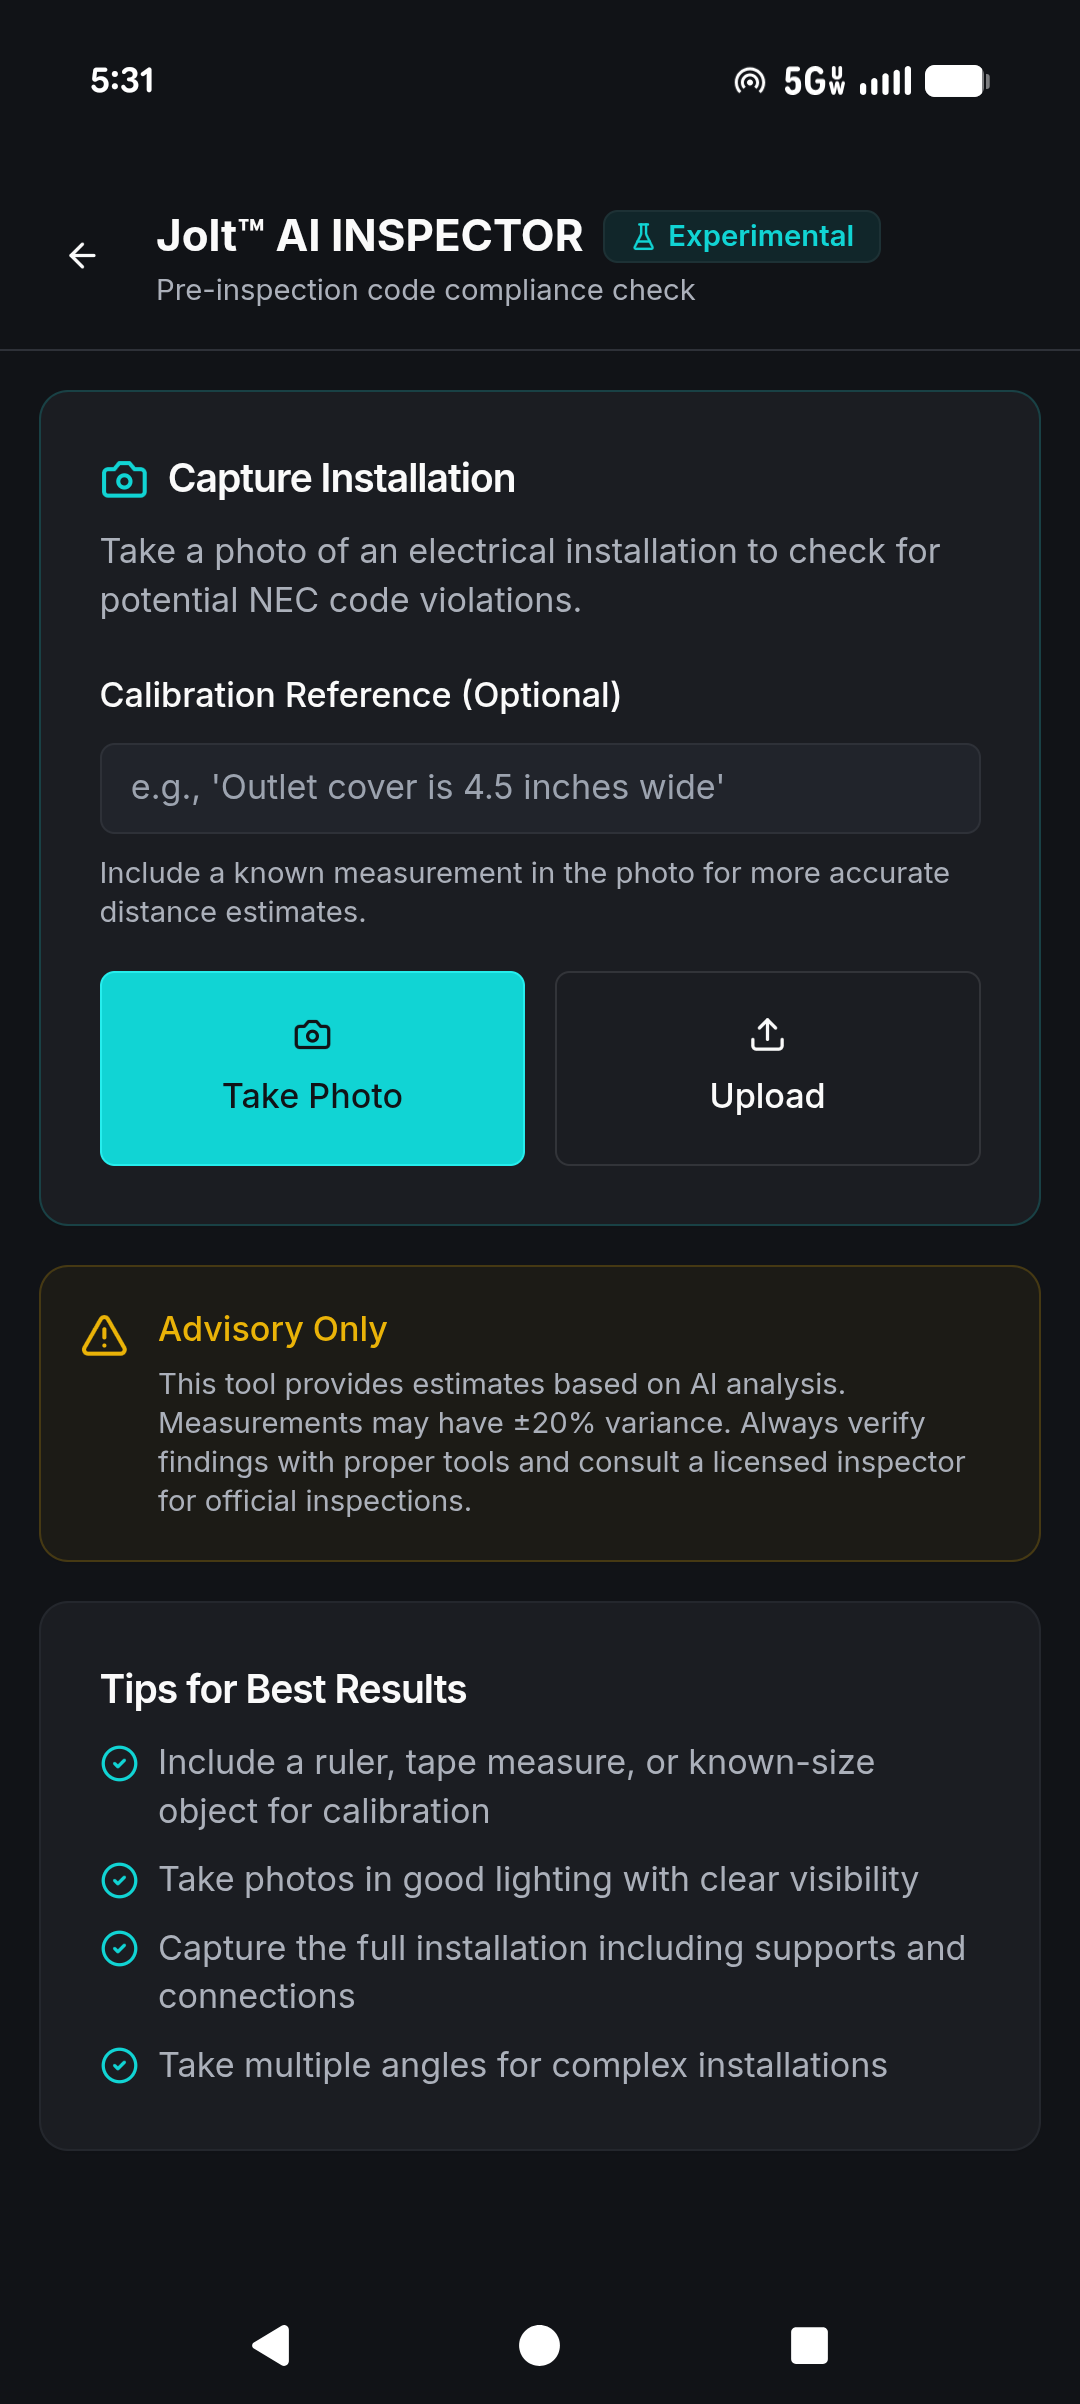
Jolt ⚡ Pre-Inspector™

Jolt Pre-Inspector Pre-Inspector screen
What This Is

A pre-inspection code check. Take a photo of your finished work — add a reference like “Outlet cover is 4.5 inches wide” so it can estimate distances. The tool generates a hard report: pass/fail, measurements, potential violations, and the exact NEC codes. Text it to your foreman.

Jolt Steps
  1. 1Open JOLT™ → Sparky → Pre-Inspector.
  2. 2Take a photo of the installation, add a size reference if you want.
  3. 3Read the compliance report and fix your screw-ups before the real inspector shows up.
Field Execution
When you finish a run, take a clean photo of it. Let Jolt run the compliance check and fix whatever it flags before you call in the city inspector. It saves you from looking like a hack and getting a red tag.
Ace 3

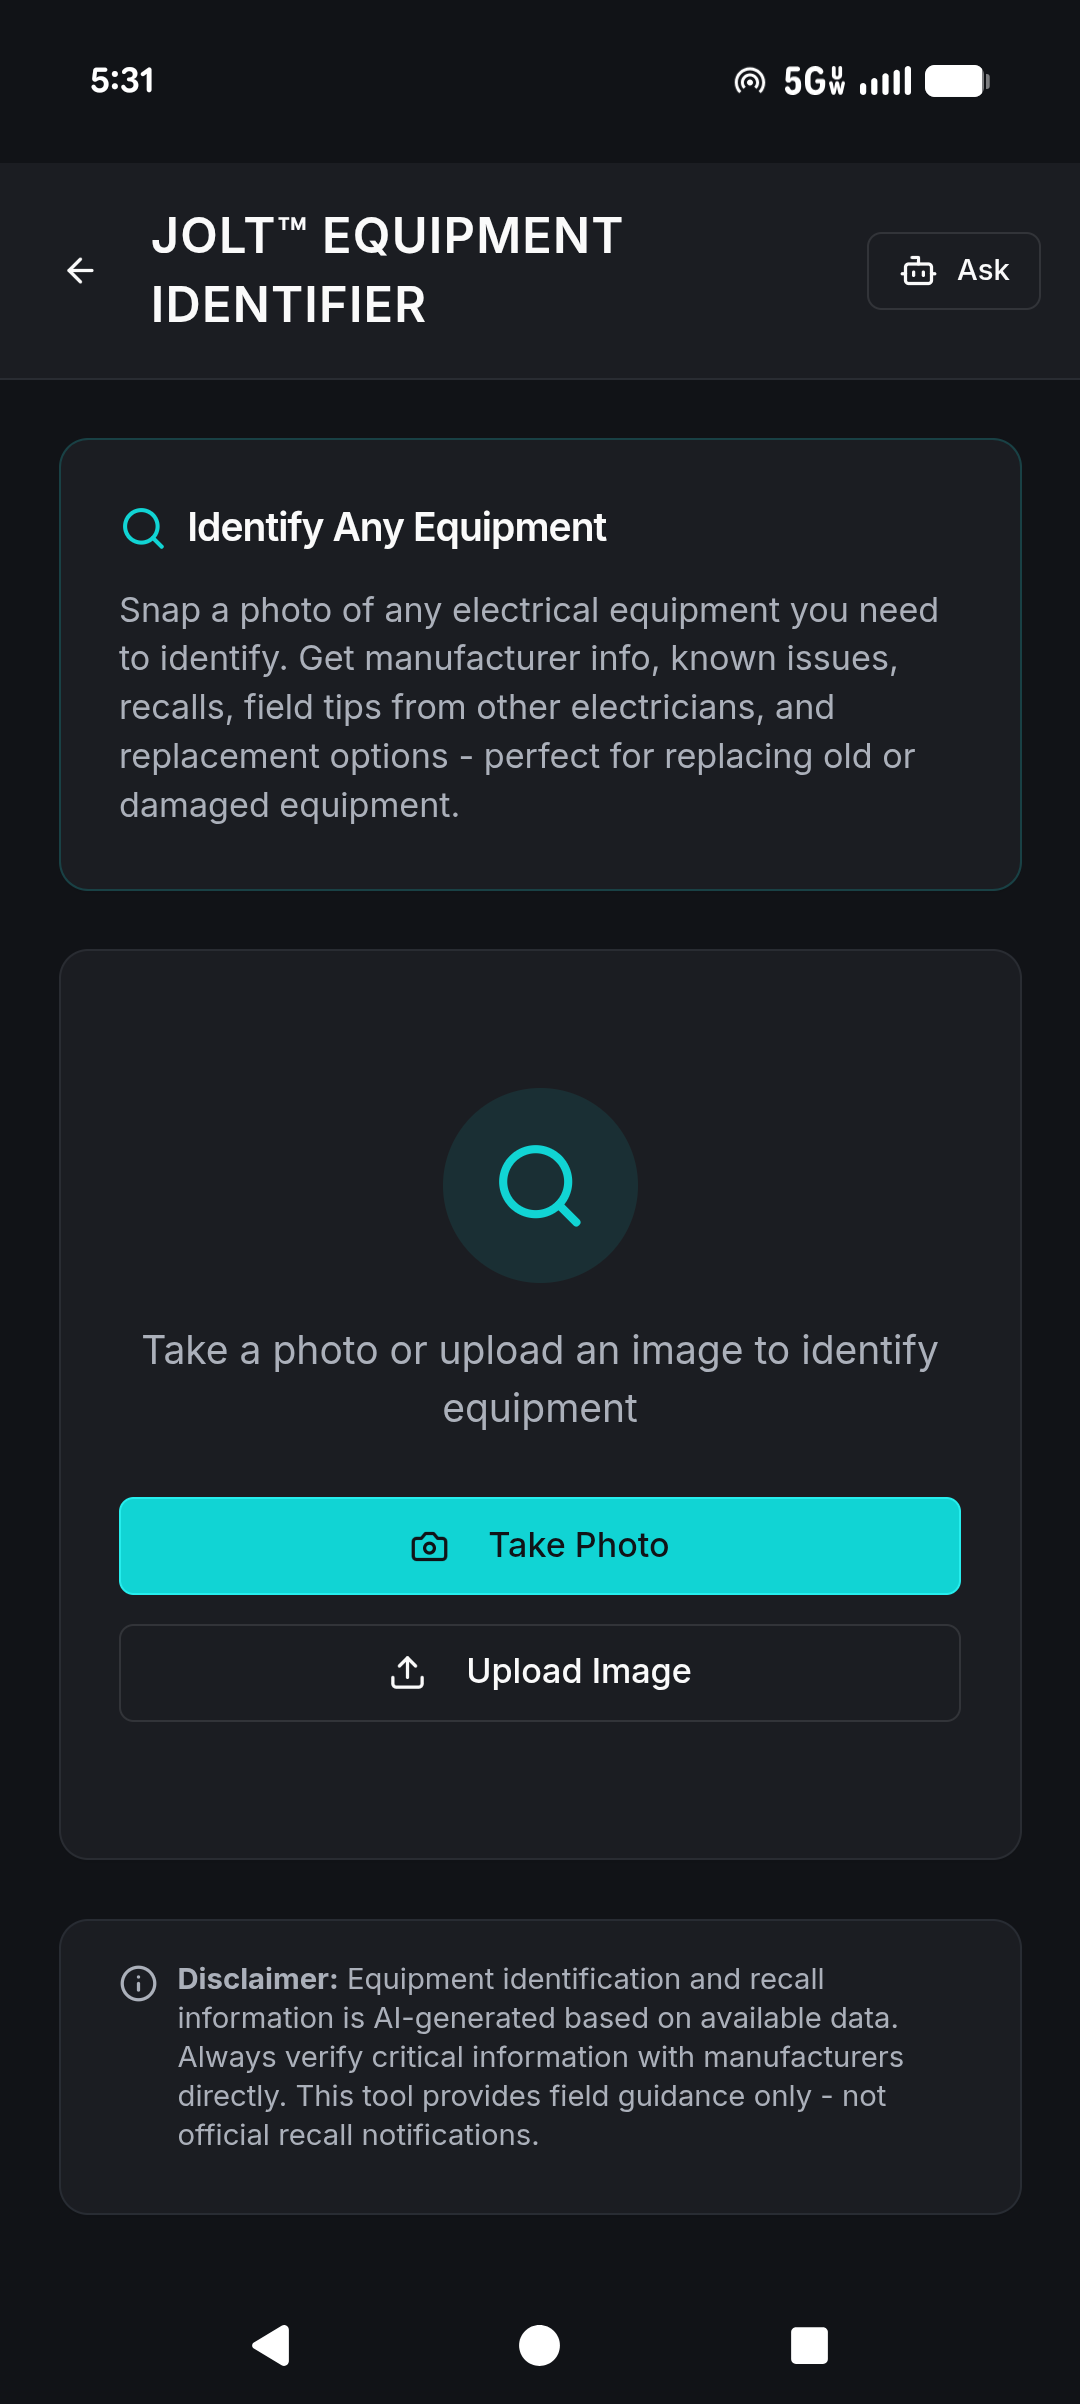
Jolt ⚡ Equipment Identifier™

Jolt Equipment Identifier Equipment Identifier screen
What This Is

A visual lookup tool for electrical gear. Snap a photo of some ancient panel, breaker, or motor with the label rubbed off, and it tells you what it is, who made it, the model number, how old it is, known issues, active recalls, and what modern parts replace it.

Jolt Steps
  1. 1Open JOLT™ → Sparky → Equipment Identifier.
  2. 2Take a photo of the gear.
  3. 3Read the manufacturer info, check the recalls, and see what replacement options you have.
Field Execution
Before you try to replace a 40-year-old breaker, snap a photo to ID it. Check the recalls and replacement options so you know exactly what modern equivalent to ask for when you hit the supply house. Hit the Share button to send the full identification results — manufacturer info, model, recalls, and replacement options — straight to your material guy or foreman’s text or email so they can have the parts ready before you’re off the ladder.
Ace 4

Jolt ⚡ Sparky™

What This Is

Sparky knows the NEC front to back and talks like a career journeyman, not a textbook. Ask it anything electrical — in plain English, by voice, text, or by photo. It gives you straight answers with the code section and the field context behind them. Sparky will walk you through a fault trace step by step, explain why a circuit is behaving the way it is, or tell you what it sees in a photo of your panel. Follow-up buttons let you drill deeper without starting the conversation over. When you’re right and your foreman’s wrong click the “Share” button and send the question and answer to his text or email.

Jolt Steps
  1. 1Open JOLT™ → Sparky.
  2. 2Type your question, talk into the mic, or upload a photo of the disaster you’re looking at.
  3. 3Read Sparky’s explanation and use the follow-up buttons if you need more details.
Field Execution
When you hit a brick wall trying to trace a fault, tell Sparky the symptoms or show it a photo of the rat’s nest in the box. Follow its diagnostic steps with your meter until you nail down the problem.

📚 Reference Library 6 Tools

Your digital code book and field reference guide. All the reference data, calculators, and NEC codes work with zero internet connection — because we know you’re usually stuck deep in a concrete basement or out in the sticks with no cell service.

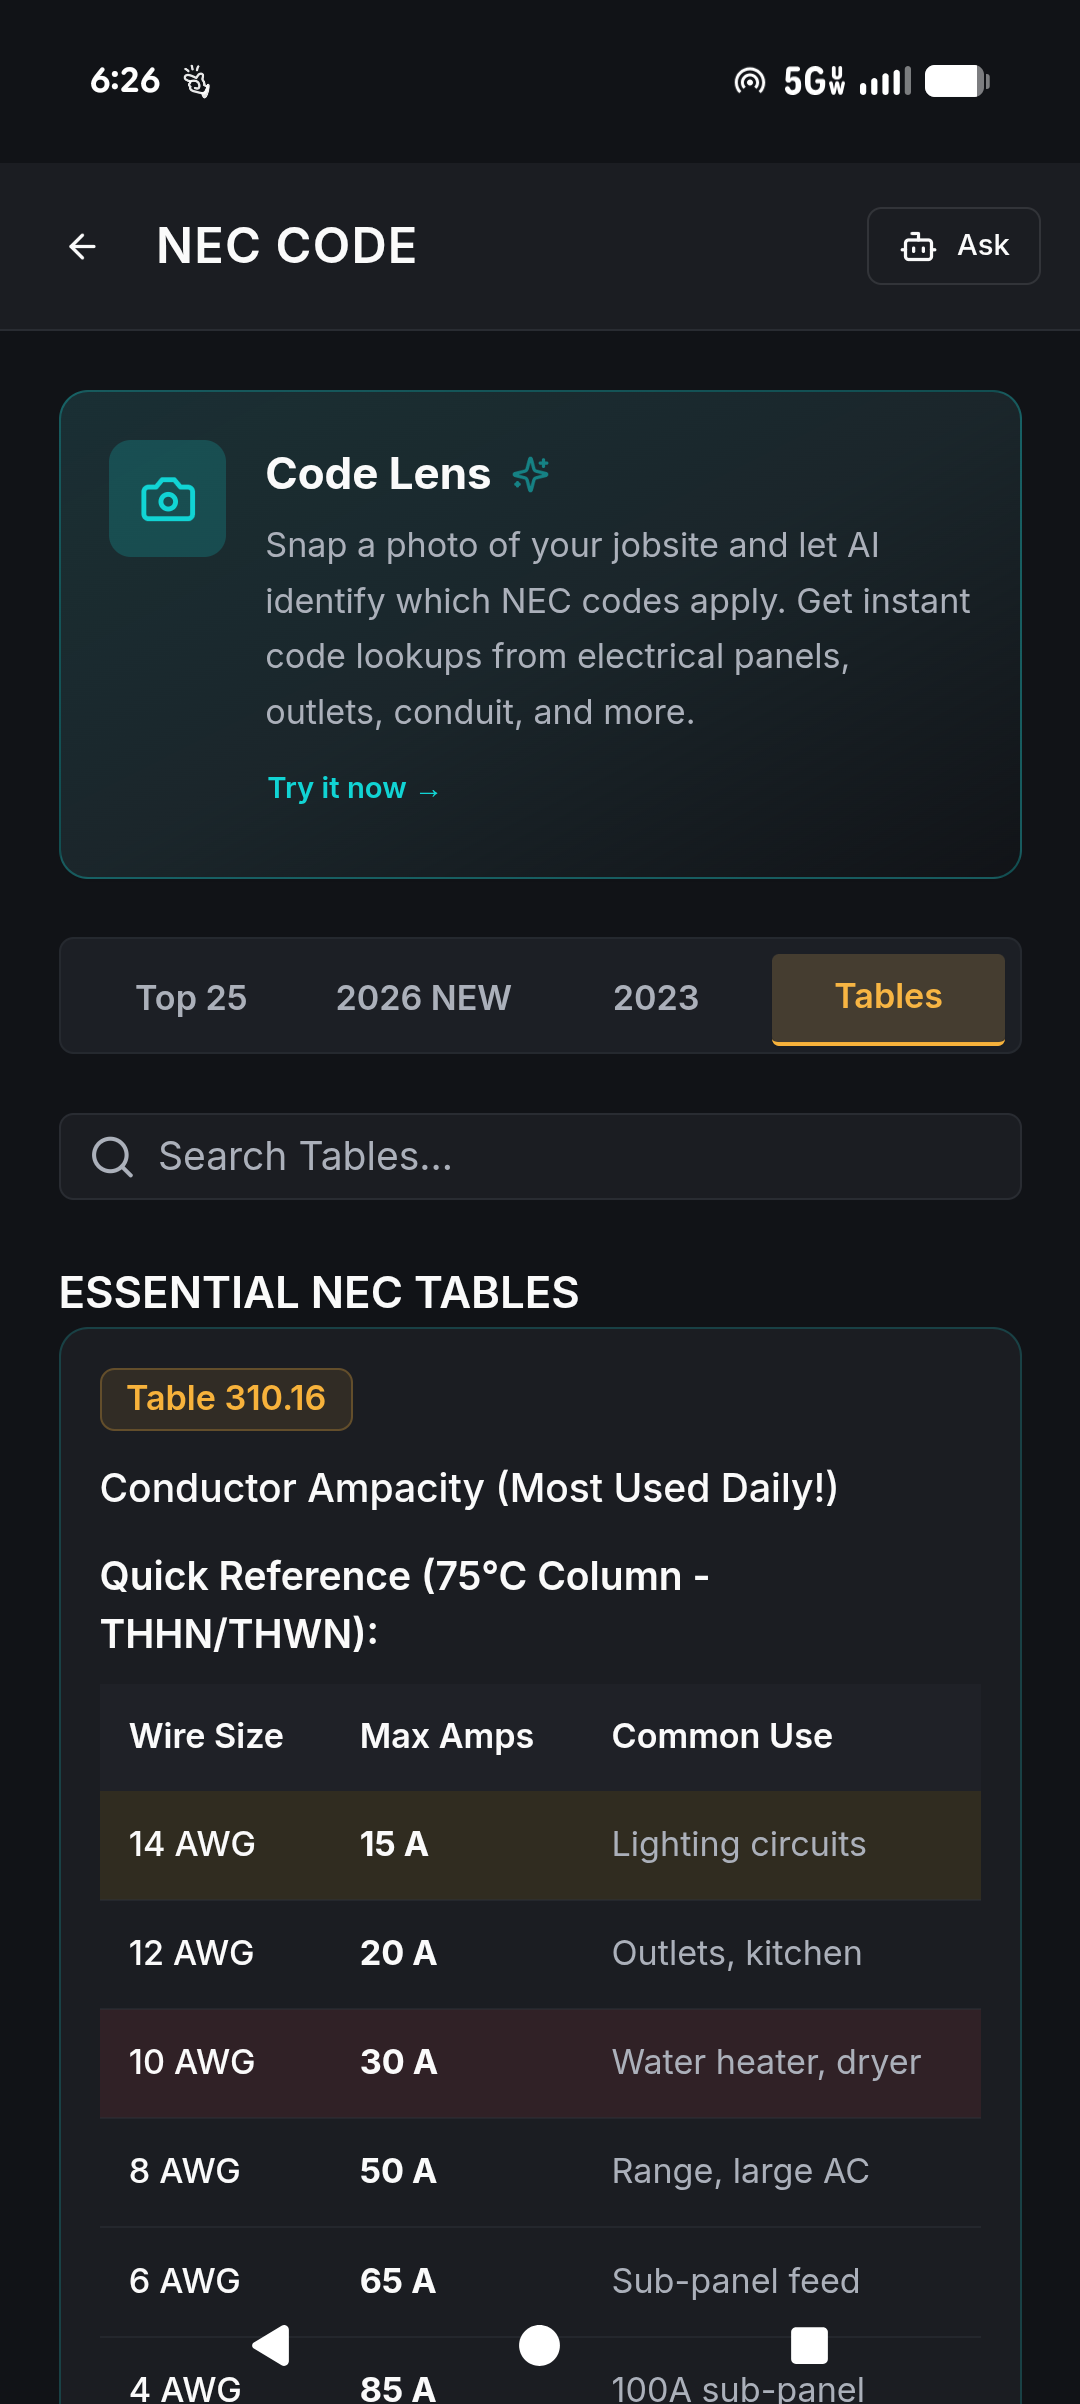
NEC Code

NEC Code Reference

Jolt NEC Code Overview JOLT™ NEC Code — Overview
What This Is

A stripped-down, highly searchable reference for the NEC rules and tables that actually matter. Instead of dragging a 900-page brick around, JOLT™ gives you the codes you use every day, translated into plain English with practical field tips.

Jolt Steps
  1. 1Open JOLT™ → NEC Code.
  2. 2Use the search bar or flip through the tabs: Top 25, 2026 NEW, 2023, and Tables.
  3. 3Tap any code section to read the rule and the Field Tip.
Field Execution
When an inspector gives you grief or you’re not sure about a requirement, pull out Jolt and search the code. Read the Field Tips to see how it applies in the real world. And remember 110.3(B) — keep the manufacturer manuals on site, because what they say goes.
3D Diagrams

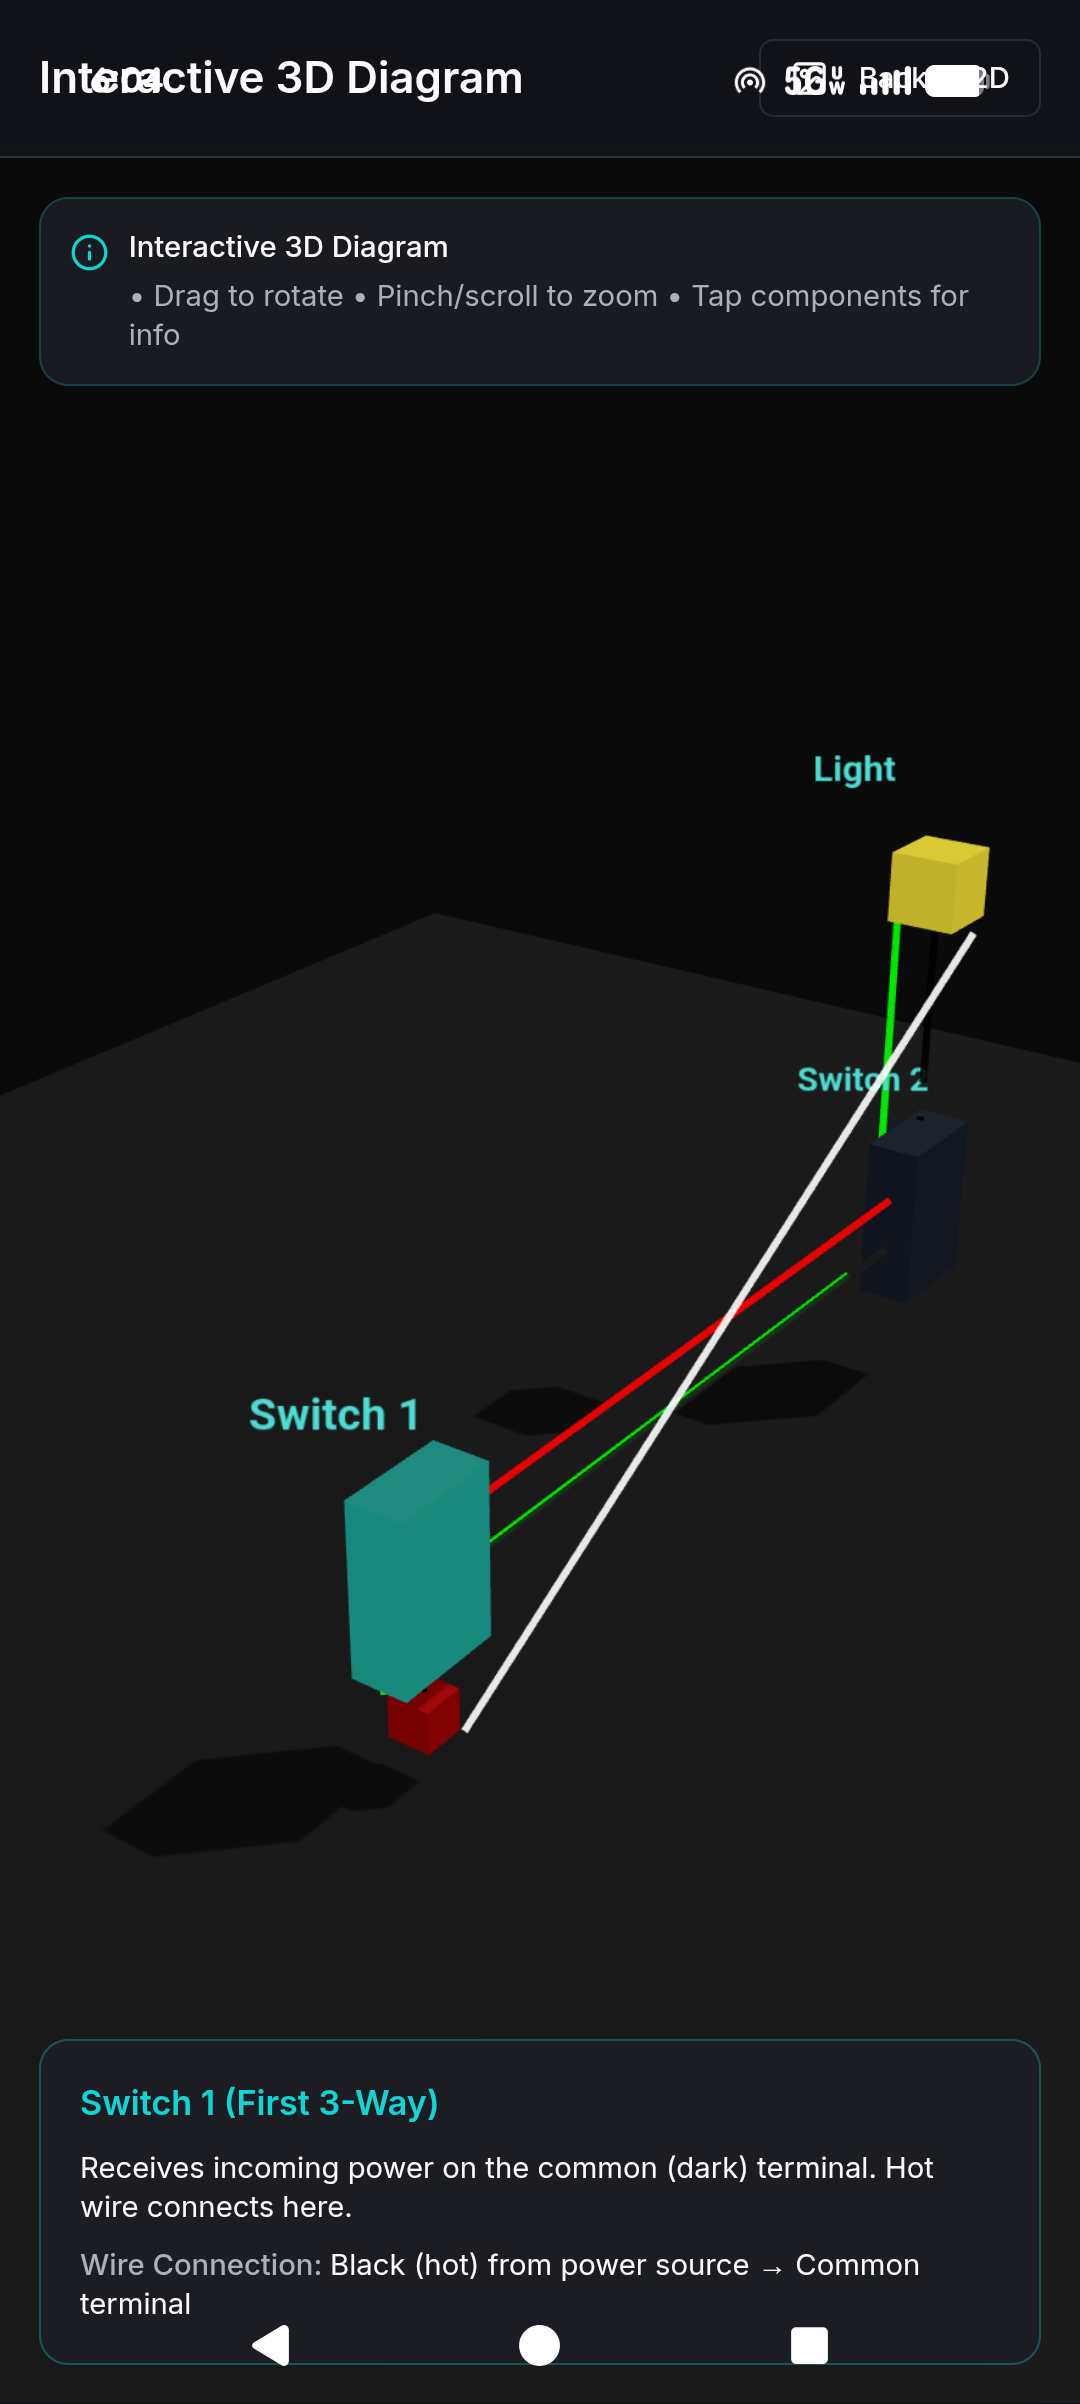
Interactive 3D Wiring Diagrams

Jolt Interactive 3D Wiring Diagram JOLT™ 3D Wiring Diagram — 3-Way Switch
What This Is

Fully interactive 3D models of standard circuits. Pinch to zoom, spin it around, tap a component to highlight it, and watch the animated current flow to see exactly what gets hot when you flip the switches.

Jolt Steps
  1. 1Open JOLT™ → Reference → Wiring Diagrams → 3D.
  2. 2Pick a circuit: 3-Way Switch, 4-Way Switch, GFCI Receptacle, or Switched Receptacle.
  3. 3Spin the 3D model around to see where the wires actually go.
Field Execution
Before you wire up a nasty multi-way switch loop, look at the 3D diagram. Visually trace the hot, neutral, and travelers so you don’t cross your wires in the box and blow something up.
Wire Size

Wire Size Chart

What This Is

Wire size (AWG) dictates how much current a conductor can safely carry before it melts. This chart gives you the NEC Table 310.12 ampacity values. Pulling undersized wire is a massive fire hazard; pulling oversized wire is just throwing the boss’s money in the trash.

Jolt Steps
  1. 1Open JOLT™ → Reference → Wire Size Chart.
  2. 2Find your breaker’s amp rating on the left.
  3. 3Look across to find the minimum wire gauge for copper and aluminum.
Field Execution
Check your breaker size, then check the chart to make sure your wire is heavy enough. A 20A breaker needs at least 12 AWG copper. A 15A breaker needs at least 14 AWG copper. Don’t mix this up.
Conduit Support

Conduit Support Spacing Chart

What This Is

A cheat sheet for NEC support intervals for every type of conduit — EMT, rigid, IMC, PVC, FMC, LFMC. Use this so your runs don’t sag and fail inspection.

Jolt Steps
  1. 1Open JOLT™ → Reference → Conduit Support Spacing.
  2. 2Pick your conduit type and size to see how far apart your straps can be.
Field Execution
When you’re running conduit, check the chart. Put your straps or hangers at or below the max distance so your installation is solid and code-compliant.
Meter Guide

Meter Guide

What This Is

A no-BS guide to using your multimeter without blowing it up. Two sections: Meter Basics (how to use it safely) and Troubleshooting Scenarios (step-by-step guides for real problems).

Jolt Steps
  1. 1Open JOLT™ → Meter Guide.
  2. 2Pick whether you need to learn the basics or follow a troubleshooting guide.
Field Execution
If you don’t know how to test a specific part, pull up the scenario. Follow the steps to set your meter to the right mode and put your leads in the right place so you don’t short anything out.
Field Hacks

Field Hacks

What This Is

A searchable list of trade secrets and tricks from guys who actually work in the field. Submit your own hacks — if we publish it, you get a 3-month free promo code and a shoutout on our social media.

Jolt Steps
  1. 1Open JOLT™ → Field Hacks.
  2. 2Look up tricks to make your life easier, or submit your own.
Field Execution
When you’re fighting a brutal wire pull or a nasty bend, check the Field Hacks to see if someone else figured out a better way. If you know a trick that saves time, submit it and help the next guy out.

🌐 Bilingual Job-Site Tools 3 Tools

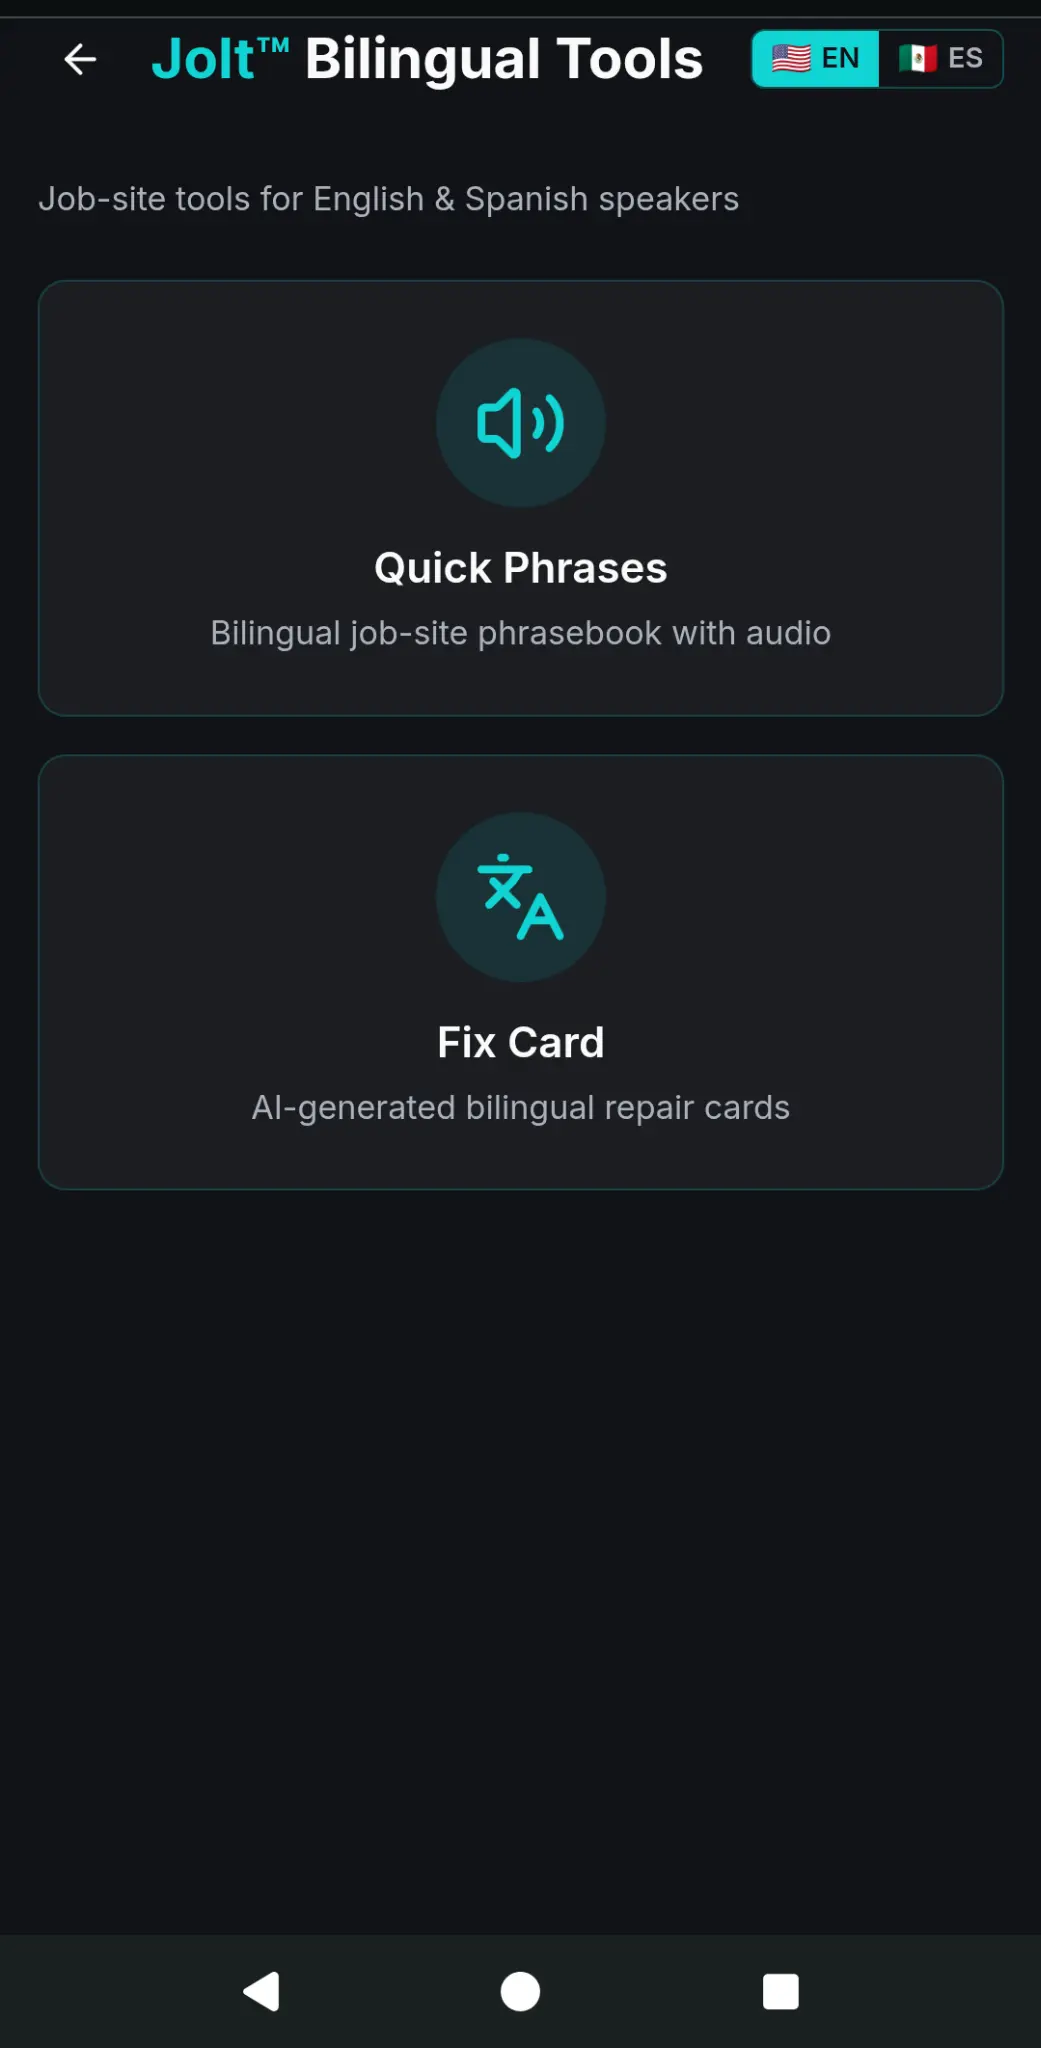
Language barriers on the job site waste time, cause screw-ups, and get people hurt. Jolt™ includes bilingual tools built specifically for mixed English/Spanish crews. Whether you’re a foreman directing a Spanish-speaking apprentice, or a Spanish speaker learning the trade, these tools kill the miscommunication right where it happens — on the job.

Jolt Bilingual Tools Dashboard Bilingual Tools hub — Quick Phrases and Fix Card
Phrasebook

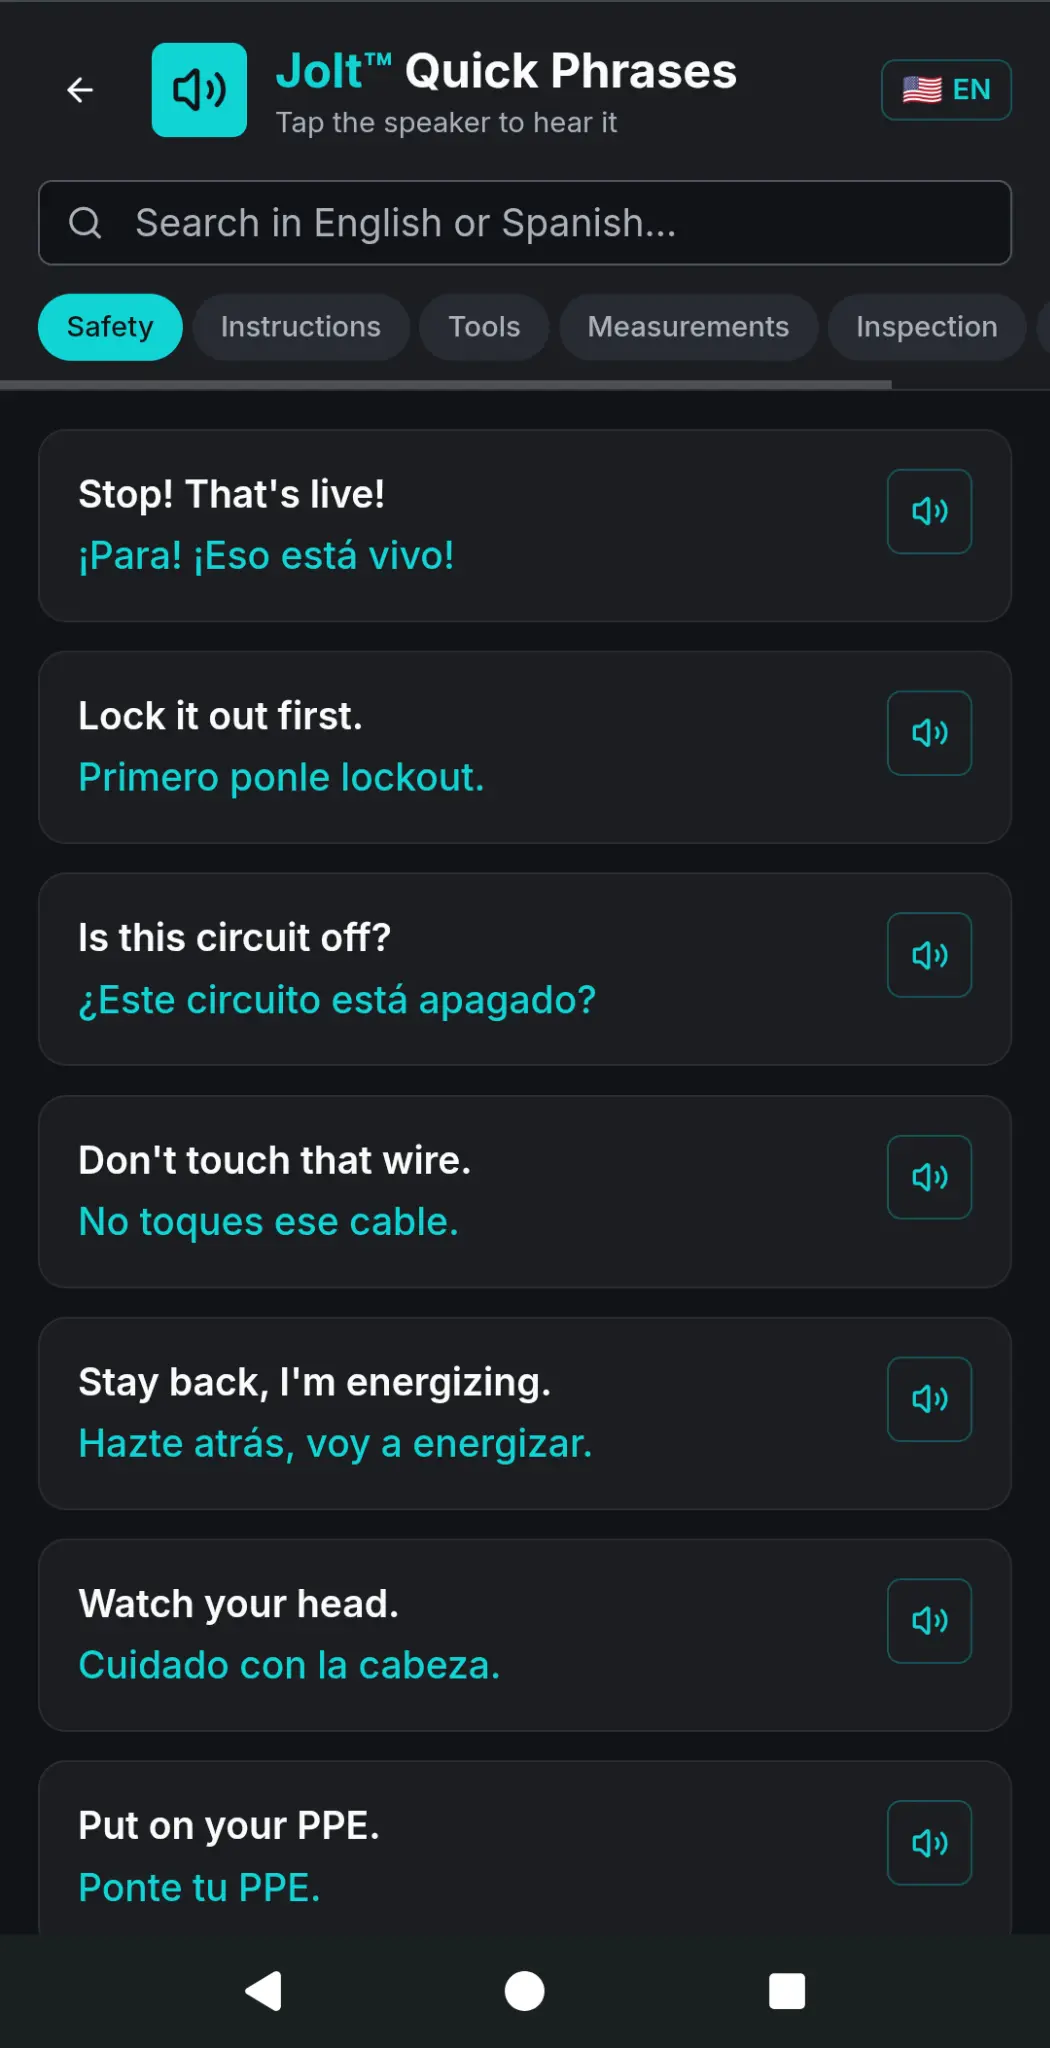
Bilingual Job-Site Phrasebook

Jolt Quick Phrases Quick Phrases — Safety category with audio playback
What This Is

An offline phrasebook built for our trade. About 80 phrases across 6 categories: Safety, Instructions, Tools, Measurements, Inspection, and General. Every phrase has English on top and Mexican job-site Spanish underneath. Hit the speaker button and the app reads the Spanish out loud.

How to Use It

Open Bilingual Tools → Quick Phrases. Pick a category tab. Find the phrase and hit the speaker icon. Works completely offline.

Example Phrases
  1. 1“Stop! That’s live!” / “¡Para! ¡Eso está vivo!”
  2. 2“Pull the wire to this box.” / “Jala el cable hasta esta caja.”
  3. 3“Hand me the lineman’s pliers.” / “Pásame las pinzas lineman.”
  4. 4“The box goes at 18 inches.” / “La caja va a 18 pulgadas.”
  5. 5“We failed inspection — fix this.” / “Fallamos la inspección — arregla esto.”
Field Scenario
A foreman needs his Spanish-speaking apprentice to run wire to a specific box. Instead of pointing and yelling, he opens Quick Phrases, taps “Pull the wire to this box,” and hits the speaker. The apprentice hears “Jala el cable hasta esta caja.” No confusion, no wasted time.
Fix Card

Automated Bilingual Repair Card Generator

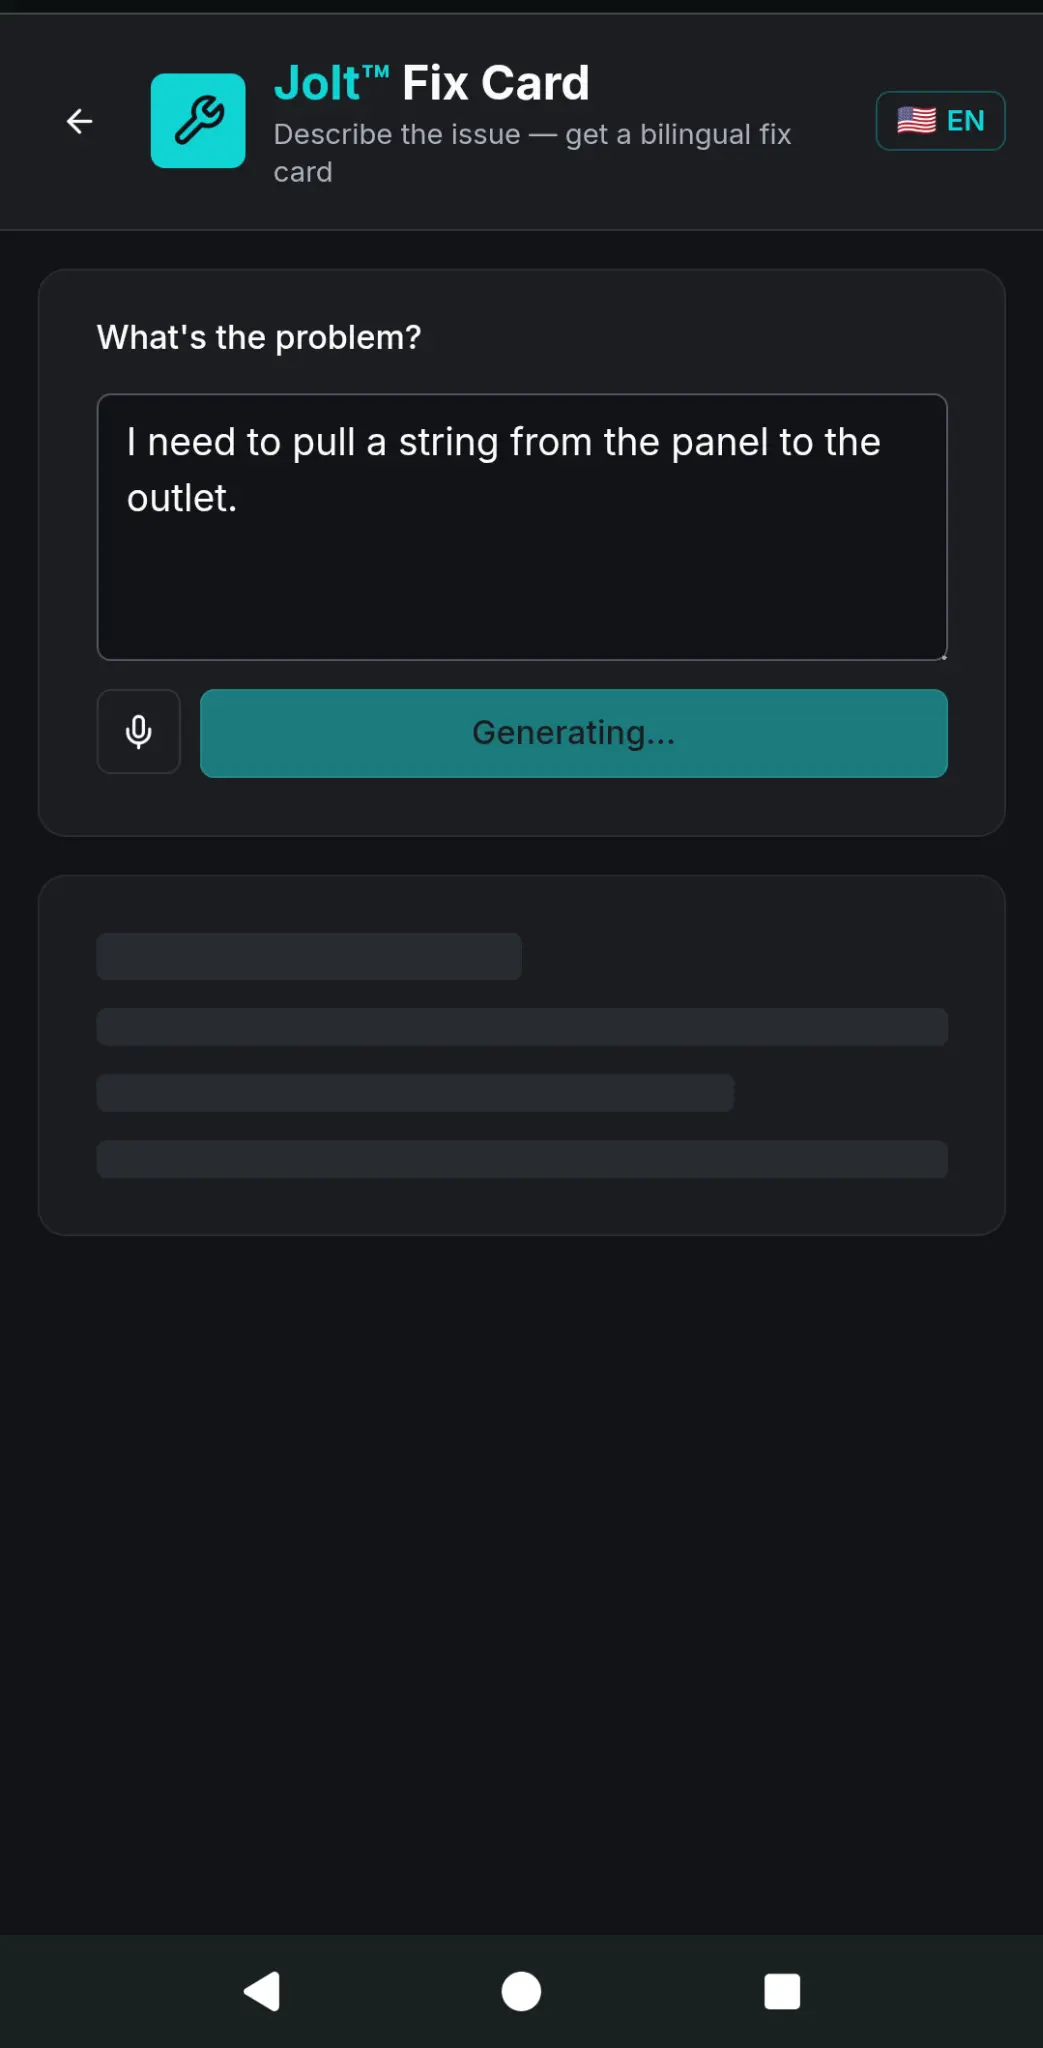
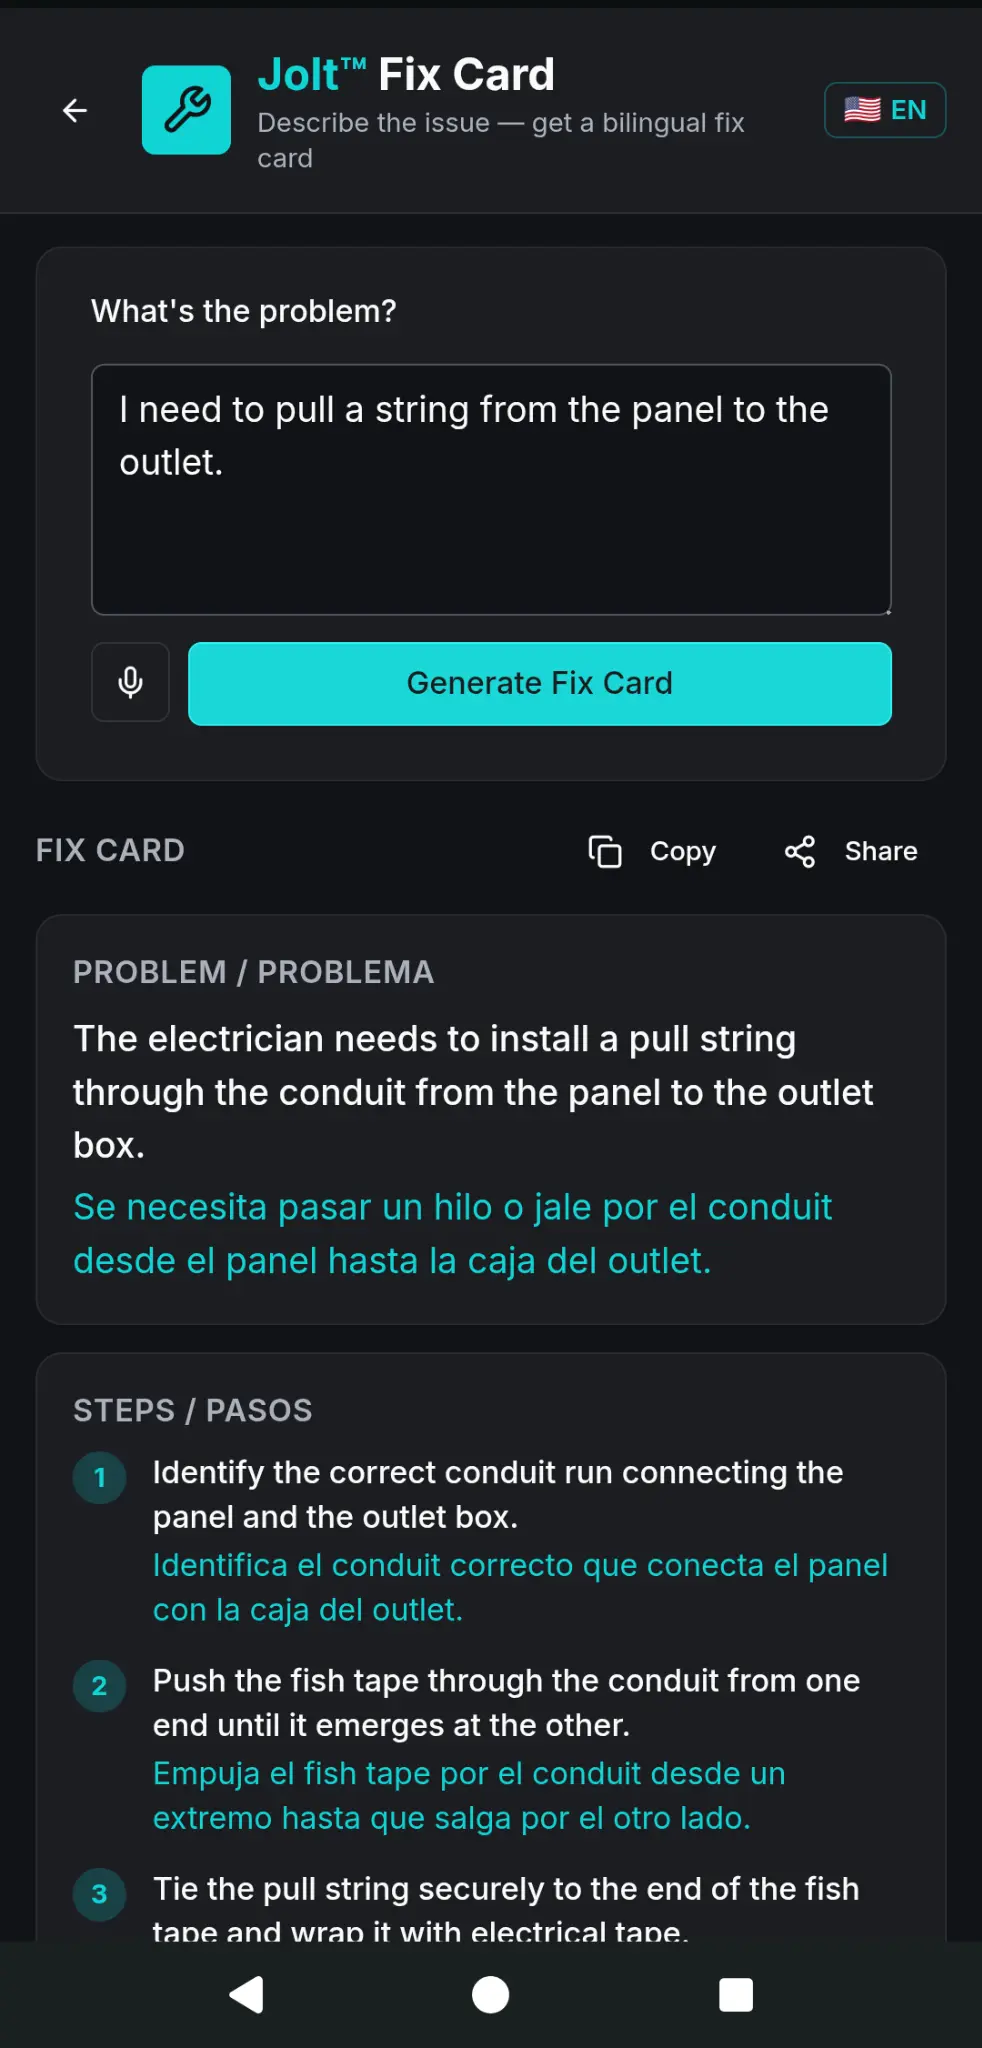
Jolt Fix Card Input Jolt Fix Card Result
Describe the problem, get a complete bilingual repair card What This Is

Fix Card instantly generates a complete, structured bilingual work order. Tell it what the electrical problem is in plain English — type it or speak it — and the tool builds a repair card with four sections: Problem / Problema, Steps / Pasos, Tools Needed / Herramientas, and Warning / Advertencia. Every line is in English and Spanish.

How to Use It
  1. 1Open Bilingual Tools → Fix Card.
  2. 2Tell it what’s broken. Hit Generate Fix Card.
  3. 3Copy it to your clipboard or hit Share to text it or WhatsApp it to your crew.
Field Scenario
The kitchen circuit keeps tripping when the microwave runs. You tell Fix Card the problem, hit Generate, and you get a full bilingual work order with step-by-step instructions, the required tools, and a warning about overloaded circuits. Screenshot it and text it to your helper so you’re both on the same page.
EN/ES Toggle

EN/ES Language Toggle

What This Is

Every screen in the Jolt™ app has an EN/ES toggle in the top corner. Tap it and the whole app flips to Spanish — menus, calculators, tool descriptions, and the troubleshooting responses from Sparky. The app remembers what you set it to.

Who It’s For

Built for Spanish-speaking apprentices who want to learn the trade on their own using Jolt™, not just for foremen. A first-year apprentice from Mexico City can open the app, flip it to ES, and use every single tool — conduit bending, code lookup, virtual electrician, wire sizing — entirely in Spanish. Set it once and the app remembers it.

📖 Field Terminology Appendix

Every term we use in this manual is defined right here. If you’re an apprentice and something in the guide doesn’t make sense, start here.

Bending

Offset

Two bends of the same angle that elevate the conduit over an obstacle while keeping the run parallel. You define it by the offset height and the bend angle.

Bending

3-Bend Saddle

Three bends that arch the conduit over an obstacle. The center bend is twice the angle of the two outer bends. You use this when you can’t cut the conduit run.

Bending

Rolling Offset

A two-bend offset that moves the conduit up/down and left/right at the same time. You have to calculate the true offset distance from the rise and roll to get this right.

Bending

Stub-Up

A standard 90-degree bend turning the conduit from horizontal to vertical. You measure the stub height from the back of the bend to the end of the conduit. Subtract the bender’s take-up from your mark.

Bending

Take-Up

The chunk of conduit eaten up by the radius of a 90-degree bend. It changes based on conduit size and what bender you’re using. Jolt does this math for you in the stub-up calculator.

Bending

Shrinkage

How much your total run length shrinks when you put an offset bend in it. Subtract this from your layout measurement or your conduit will come up short.

Electrical

Ohm’s Law

The math that runs everything: V = I × R. Power (W) = V × I. Learn it. Use it every day.

Electrical

Voltage Drop

How much voltage you lose over a long wire run because of the wire’s resistance. The NEC wants a max of 3% drop for branch circuits.

Electrical

AWG

American Wire Gauge. Lower number = fatter wire = more amps. Common sizes: 14, 12, 10, 8, 6, 4, 2, 1/0.

Electrical

Ampacity

The maximum continuous current a wire can carry before the insulation starts melting. Depends on gauge, insulation type, and ambient temperature.

Code

NEC

National Electrical Code. The rulebook. Updated every three years. JOLT™ has the 68+ essential codes you actually need, including the 2023 and 2026 changes.

Safety

GFCI

Ground Fault Circuit Interrupter. Trips in 1/40th of a second to keep you from getting electrocuted. Required near water — bathrooms, kitchens, garages, outside.

Safety

AFCI

Arc Fault Circuit Interrupter. Detects dangerous arcing in the walls that causes fires. Required in bedrooms and living areas in new construction.

Safety

LOTO

Lockout/Tagout. OSHA rules for killing power before you work. Your personal lock goes on the breaker so nobody can turn it back on while your hands are in the box.

Safety

NCVT

Non-Contact Voltage Tester. Your “hot stick” or “tick tracer.” Beeps and flashes near a live wire. Use it to prove a circuit is dead before you touch it.

Materials

EMT

Electrical Metallic Tubing. Thin-wall steel conduit used everywhere in commercial work. Easy to bend, uses set-screw or compression fittings. Keep it out of the dirt and concrete unless it’s protected.

Code

Overcurrent Device

A breaker or fuse that trips when it gets too hot. You size it to protect the wire, not the equipment. 12 AWG wire gets a max 20A breaker. Period.

Diagrams

Pictorial Diagram

A 3D picture showing the actual devices and where the wires physically go. Way easier to read than a schematic when you’re actually wiring the box.

Code

Conductor Color Code

120/240V: black/red = hot, white = neutral, green/bare = ground. 208V 3-phase: black/red/blue = hot. 480V 3-phase: brown/orange/yellow = hot.

Ready to work smarter?

Stop doing the math on scrap cardboard.

JOLT™ handles the calculations, the code lookups, and the compliance checks — so you can keep your head in the work. Built by an actual electrician. Tested on real jobs.

Try It Free →
Android
Google Play Store
$9.99 / month
Apple
$8.88 / month
🟢 5-day free trial for all new users — no commitment required.
Our Mission

Funding Senda Trades

This app is funding a project to open the door to a blue-collar career for thousands of people. 50% of every subscription builds Senda Trades, our interactive virtual apprenticeship platform designed by electricians to train the next generation of electricians.

You’re not just buying a tool. You’re becoming a founding member of this mission.

This is bigger than an app. I’m Michael, the founder of Rambam’s Ladder, and we are building Senda Trades — a virtual apprenticeship to train the next generation of electricians. 50% of your subscription to Jolt directly funds its creation. You’re not just buying a tool. You’re becoming a founding member of this mission.

Learn More at Rambam’s Ladder →